Our 2018 Kitchen Rennovation To The Nest
<< Previous | Kitchen | Demolition | Plaster '70s Wall | Plaster Cabinet Wall | Wall Cabinets | Sink Cabinets | Plumbing | Plaster Sink Wall | Flooring | Cabinets | Countertop and Sink | Finishing Touches | Next >>
(Saturday - 24 February 2018)
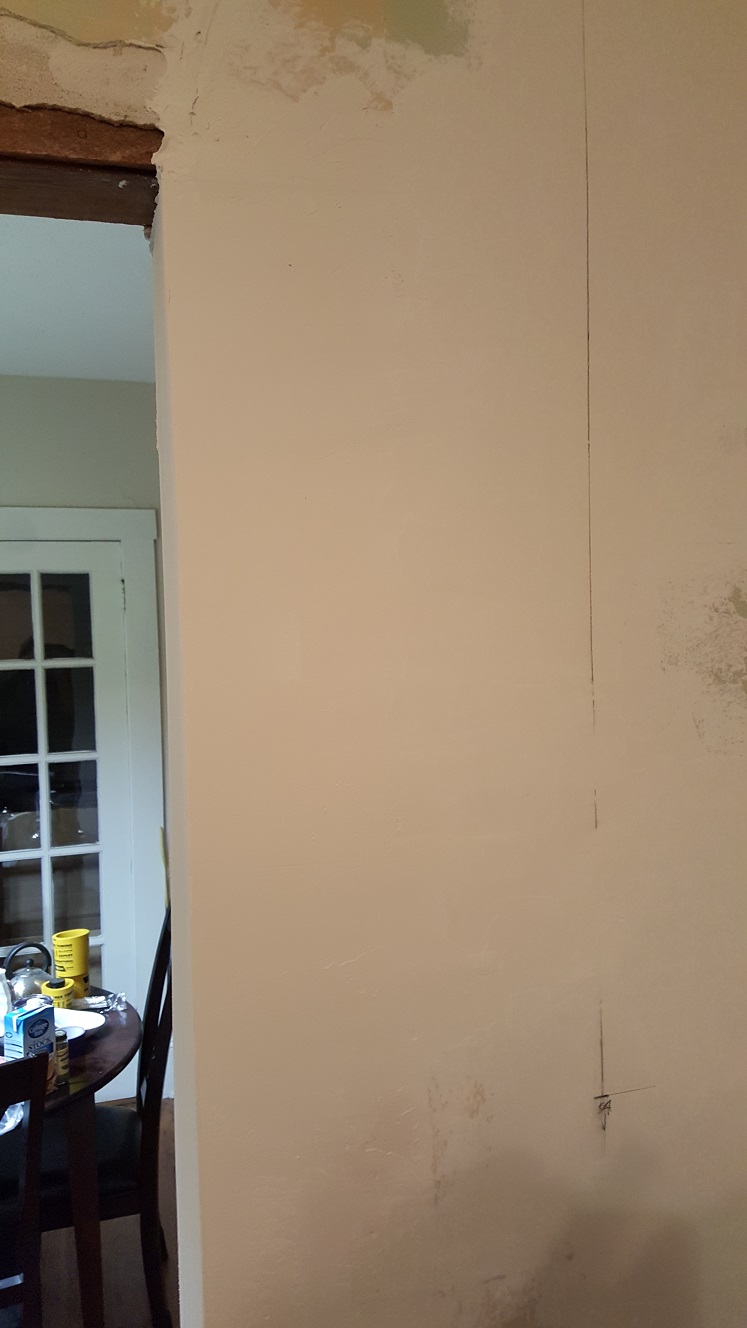
A couple of days ago Ann and I
placed the 18" cabinets around the stove to judge the fitment, whether we would
have to slide everythng over a few inches, and how to finish the edges of the wall that needs extended out to
at least enclose the side of the cabinet. Pictures would help explain...

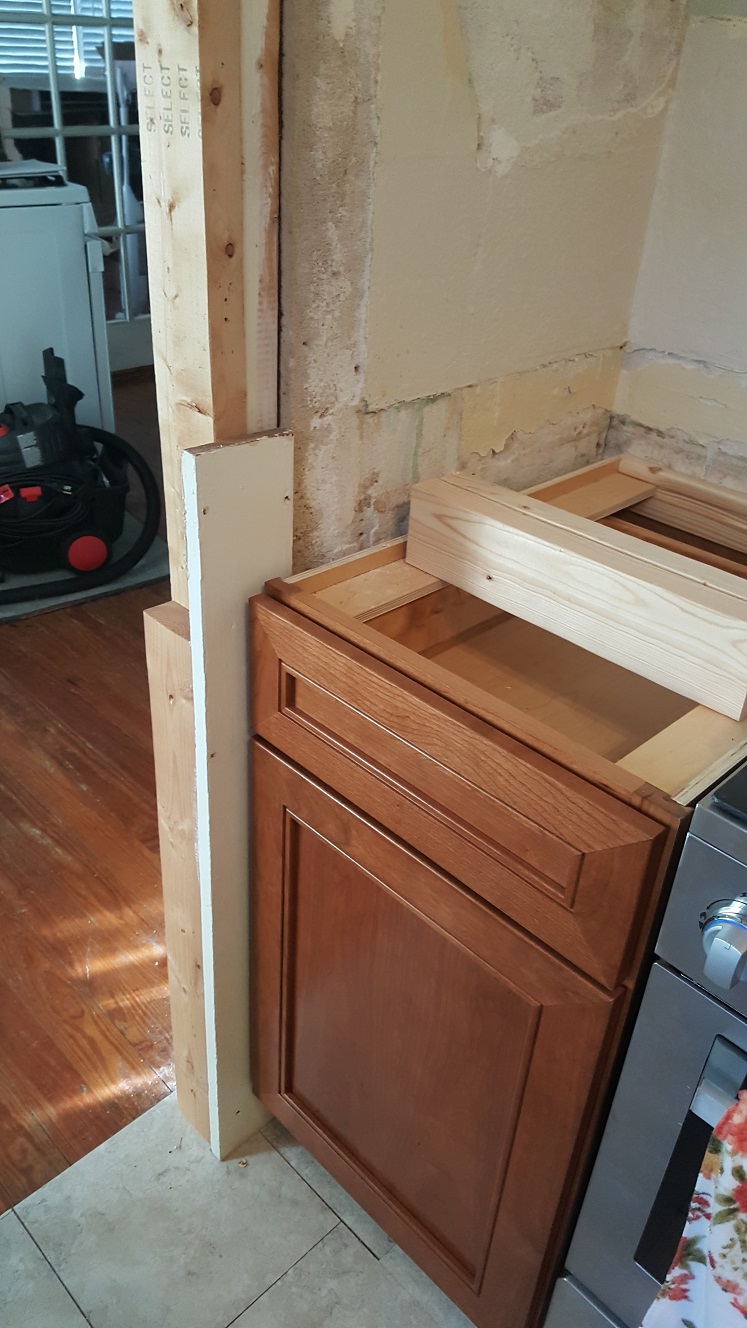

So this morning I placed some 2x4s to demonstrate to Ann what the different "configurations" would be, with the wood trim as if it were still a doorway, or without it and just corners or corners and "corner guards". We are going with corners at the very least. So stupid me left the 2x4s standing there against the doorway into the kitchen, unsupported by anything but their own weight, and something told me I should move them but I didn't. A short while later, I hear one, then the other crash to the floor and Ann fussing. I yell in, "Are you okay?" Back comes the reply, "Yeah, one of 'em just hit me in the shoulder".
She was busy cleaning up the kitchen for round two of demolition on the wall behind the stove and refrigerator. I thought we'd be doing it together, but she started without me. Now that I've joined her, we cover the dining room table and the kitchen appliances with plastic "dropcloths". I grab the short ladder for her and help her tape another one across the opening between the kitchen and dining room, which I just had to get up and retape as it appears that even the super purple duct tape can't even hold it!
I had been pulling off all the loose top coat plaster with a putty knife, trying to catch what I could of the falling mess in the waste basket, held in my other hand. The dust got to be too much for me and I realized I wasn't wearing my mask or goggles. The waste basket is already full of rubble, as is the floor, so this is a good time to take a break. Ann and Nick had just left on yet another errand to Lowe's for more mud and mixing buckets, and I decided it would be a good time to shower up while they were out.
This wall is already turning into as much work as the other one, but at least most of it will be covered by cabinets anyway. Still, I'd like it done well. A wall well done... So now I sit here writing this and thinking about what's next. I return to removing the rest of the loose plaster. Like the other wall, the more I remove, the more I find needs removed. When I get to the short expanse down from the ceiling over the opening into the dining room, I'm able to remove an entire coat of paint by just peeling it off, and boy is it thick. The entire length of that wall, the paint just peels right off, revealing the previous paint colors, those '70s colors.
I'm wondering if that layer of paint was really some kind of thick wall covering meant to hide flaws and cracks in plaster walls. Guess I'll have to research that. Ann and Nick are finally back from their travels, with the stuff I'll need and the new paint for the kitchen, but no lunch? So glad I didn't eat anything, thinking they'll be bringing back lunch... Not a big deal, they're back out gallivanting around, and I'm back to finishing the wall demolition. Originally I wasn't going to remove the loose stuff just above where the tops of the wall cabinets would land, but I came across a loose vein way below and it just kept going up and up until most of the plaster was missing all the way to the ceiling.
Same thing happened later in the dining room as I realized I forgot to prep the opening around the missing plaster where those hanging cabinets used to be. The little bit that came out of the bottom corner then found a vein that travelled up under the smoke detector and over top of the window frame. before I knew it, most of the top coat for that section of wall was gone! Great. More mud. But once again, I'm getting ahead of myself. This time when the two jolly travellers returned, they did bring lunch, albeit closer to 3:00 than 12:00. They also had goodies they scored at Target because Wally World and Lowe's didn't have what they were looking for.
When I finally finish my Wendy burger, I start to drift off in my chair, but keep waking myself up. I feel cold and get up to set the thermostat back up and that's enough to wake me the rest of the way up. Time to get busy mudding. I decide to start with the patches I'll need the ladder to get to and am surprised that one entire bucket only fills one of the patches that goes to the ceiling. The next bucket fills the other one, but now I'm worried it's going to take a lot more than I thought just to first coat this wall. It's really two walls, one of which has a big opening in it. Two more batches and the wall has its first coat.
Tomorrow I'll probably start by locating the new refrigerator outlet in the new drywall and then mounting the drywall to the studs so I can tape and first coat those joints too. Once that's done, I'll be able to plug the refrigerator into the new outlet, allowing me to move the old outlet that it was plugged into. It needs moved mainly because it's now in the wrong place, sitting pretty much where the wall of the refrigerator surround will now meet the wall. It's in the middle of the joist space, so thankfully we won't have to get into the attic and move the drop over to the next space like I originally thought we would.
I say we... It would have been Nick doing the getting in the attic part. All I should have to do now is locate and cut out the new opening with our new Dremel Saw Max that did such a wonderful job last time. Then I'll be able to patch the existing hole and first coat it with mud as well. Once that's done, I can either move on to the second coat of mud or rip the 2x4s and cut and fit the drywall to extend that wall opening and first coat it too. That is, I could if I had the corner molds I need for mudding the drywall corners. Second coat of mud it is then.
The focus is on getting the wall cabinets up so we can put stuff in them, getting the stuff sitting in boxes in the living back up off the floor. We had to move those floor cabinets back out onto the front porch and out of the way for this latest round of demolition. But they'll have to come back in to again check fitment and allow us to visualize and think about the best placement. The last thing I want to do is get the wall cabinets up on the wall then realize they'll have to come back down because we didn't think about something until it was too late. Knowing the way things go... Don't want to jynx myself.
<< Previous | Kitchen | Demolition | Plaster '70s Wall | Plaster Cabinet Wall | Wall Cabinets | Sink Cabinets | Plumbing | Plaster Sink Wall | Flooring | Cabinets | Countertop and Sink | Finishing Touches | Next >>
(Sunday - 25 February 2018)
Alright! I'm awake already! Not really that bad, and the animals did let us sleep in until 6:30. Ann pushed the
button on the coffee maker and I got up shortly after it beeped that the coffee was ready. The dogs are already
at it, playfully "fighting" with each other... So far a nice Sunday morning. Already have the Flagstaff, AZ
Virtual Railfan live feed from the train station there playing on the TV. It's below freezing with snow on the
ground there, and 72° here. Watched the morning passenger train stop, looking to be a bit earlier than
usual, but I have no idea what the schedules are. Those cars sure look luxurious, at least by modern standards.
Maybe I should look into a train trip for our 35th Anniversary trip?
So the first thing I do is figure out where the refrigerator outlet is going, measuring and marking the location, then cutting it out with the utility knife. Then it's time to actually attach the drywall to the new studs. I put off doing it until now just in case I needed back in there for whatever reason. With the drywall mounted, I put in the new outlet, flip on the breaker, and tranfer the refrigerator plug from the small appliance branch circuit it's plugged into that needs moved. That's next, but where will it go? I don't want to just jump in and cut a hole then have it be in the wrong place. I'd kind of like it centered over the new countertop to the right of the stove.
Well, that's going to take a little planning. Not much, but some. I've been adding and updating my cabinet drawings in SketchUp. I'm not quite ready to lay out the kitchen, but at least I now have all the measurements I need with the real McCoy sitting on the front porch! When we had the base cabinets set in the kitchen I made some crude measurements and located the new positions, within a couple of inches, realizing that I'll probably have to move the gas feed for the stove to the right by a couple inches as well. That will have to wait. The job at hand is moving the outlet over, but that means I'll have to reinforce the lathe around the old opening before I can make a new one.
After a number of trips back and forth to the garage to cut down pieces of that ¼" stringer stuff and many holes poked in my fingertips by drywall screws after reaching into the hole to hold them in place later, I finally manage to get the lathe around the old hole stabilized. Oh look, this chunk of drywall I just cut out for the new refrigerator outlet fits into the old hole perfectly! Time to get that new hole cut...
(Sidebar anyone?)
After totally destroying the plaster around a new outlet opening too many times and places in
this house, I finally found the trick while trying to fix the disaster in the kitchen wall where the
outlet next to the light switch had to move down the wall.
In the past I had used a handheld scroll (jig) saw or even the sawzall to cut out the opening. If you've ever used one of these you'll know that these damned things ALWAYS manage to catch on something and vibrate the hell out of it. Well, that vibration is exactly what breaks all those plaster keys that hold it to the wall. Long story short, I noticed that these old work boxes just fit height-wise between two lathe slats. That means every time I tried to cut down the length of the lathe I was doing unnecessary work, and unnecessary damage, when all I had to do was figure out where the openings between the lathe were. All that's left is to cut off the two pieces of lathe at both ends (once the plaster is removed of course).
I say all that's left is to cut off the ends, but really, that's the trick now isn't it? To locate the slots between the lathe, I use a small masonry bit (3⁄16" - ¼") in the drill and "search" until I find the opening, where the drill plunges all the way through. I usually locate the opening close to a stud, to provide the maximum strength on one side, and tie together the lathe on the other side with a chunk of that ¼" stuff, also connected very close to the stud. So once I find the opening, I use the flutes of the bit to remove the plaster until I reach the stud, then the other direction until I've reached the other side of my desired opening. I repeat this step two pieces of lathe above or below the first.
While I could use the masonry blade for the new Dremel Saw Max, it's more trouble to change the blade between the wood and the masonry one all of the time, so I just use the utility knife to quickly "slice" through the plaster until it (usually) crumbles out of the opening. Then I break out the dremel saw to finish those end cuts. Unfortunately, this means overcutting into the plaster with the wood blade, which tends to dull it very quickly. I get maybe two openings before the wood is smoking from a dull cutting blade. For any "stragglers" I may have missed, I just use a drill bit and drill through the problem area(s), again using the flute if need be. Anything to keep from vibrating that wall apart.
So now that I've located and prepared the opening, it's time to move that outlet. Ann and Nick bought some new ground fault receptacles last trip to Lowe's, so one of those and an old work box later, we have a relocated small appliance branch circuit over what will be the (approximate) center of the new countertop! There! All the heavy duty mess making work is done. Time to move on to mudding. And taping...
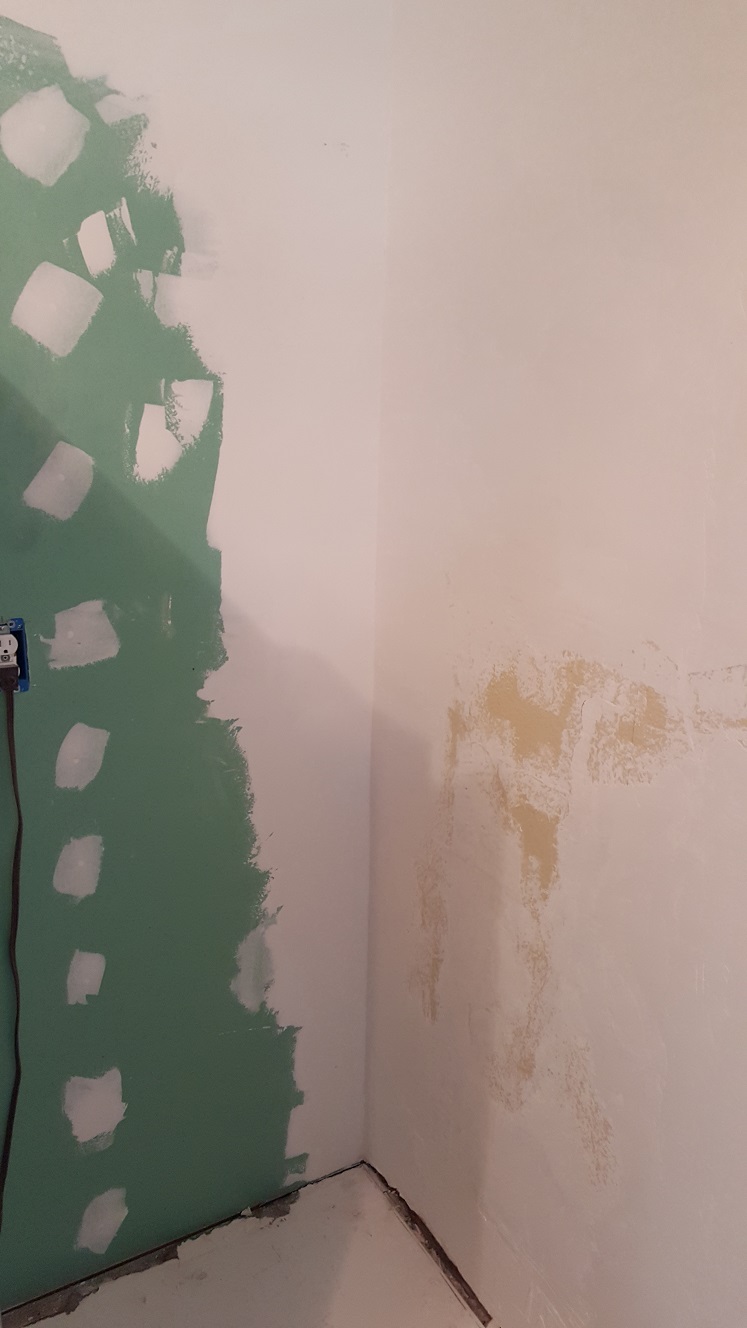
As in taping drywall. I already cut the pieces of drywall tape to fit last night, so all that remains is to mud them in place. It takes an entire batch of mud just for the corner tape, and another for the remaining tape around the old door opening, with just enough left over to just cover the old outlet opening. That's pretty much going to be it for the mud today. Again, until I get the corner molding and rip the 2x4s to extend the wall, not much left I can do. This time I don't have a Monday holiday waiting for me, so time to get cleaned up and relax.
(Friday - 2 March 2018)
So for the last few days I've been trying to finish up my SketchUp components for the kitchen cabinets. That
way I can positively place them all to see how they fit together. As much as I've been worried we didn't have
a "punch list" of all the items we're supposed to have, I realized we did have the original Lowe's
receipt. I entered those into an Excel sheet to create a sort of checklist of items. This helped to gain an
idea of what we should have and what it's meant for and to know for sure if we're missing anything - like the
base to the pantry. All this time I haven't been able to figure out why the pantry itself was only 91½"
tall yet the matching side panel on the other side of the refrigerator was 96" tall.
The more I talked with Ann about it, the more frustrated she became, and I could tell. Add to that the number of new questions raised by the spreadsheet and my now completed (enough) SketchUp model, and it was just too much for either of us. We decide it's time to schedule an appointment with Greg at Lowe's to get some answers. Since I work from home on Fridays, it's easy enough for me to call first thing this morning and see when Greg and I can sit down and talk. He tells me he has no appointments all day so far and asks how soon could I be there. I tell him to give me about half an hour and I'll be in. So armed with my laptop, I'm off to Lowe's...
The big question, and my first, is how is that pantry supposed to work? When Greg tells me it has a separate base piece that should have come with it, I tell him I haven't seen one and ask would it have been a separate line item? He tells me it isn't a separate line item and it should have been a separate box. I tell him there definitely wasn't a separate box but I can look again when I get home. He gets the cabinet folks on the phone, asking if they remembered that Stewart job and the problem with the delivery folks... Well, we've got another problem he tells them, and I'm kind of chuckling to myself. The final choice, fashion my own and work out some kind of credit to the account or wait a week and a half while they build and ship another one. Yeah, ship me that new one please.
Greg asks me if there's anything else he can help me with and I tell him I'm having trouble figuring out just how that refrigerator surround thing is supposed to go together since this is the first time Ann and I have done that. He explains it just how I would have expected it to go together, but I don't think he realizes specific questions I'm asking him. Thankfully I had already done enough work to lay out the kitchen to know I was going to have gaps and other issues that I'm not sure how handle. I zoom in to to show him the 1⁄8" gap I'm going to have between the side of the wall cabinet and the tall surround piece, he tells me I should screw together just like the other face frames.
I ask won't that need some sort of filler piece or at a minimum need shimmed? He tells me with that small of a gap it's not going to hurt to not shim it and that's the way they did it on the floor display and to have a look it. So I'm still not convinced that I don't need some sort of filler blocks to hold the back of that tall surround panel and he reiterates to have a look at the display, and the white KraftMaid one around the corner actually has one of those panels. Okay, good enough, I'll have a look. The next question is still related to that 1⁄8" gap that won't go away, and won't the face frame or the countertop have to be notched to work around it? The answer is the countertop installers will take care of that, I don't have to worry about it.
I feel my question isn't being answered. No, I know it isn't being answered, but rather glossed over. When I press for a better answer, he reiterates that when they come to measure and make their templates, they will take care of it, but we'll need all of the cabinets installed and the appliances in place, etc. I guess trying to make me feel the pressure or something. No big deal, I tell him perhaps I'm trying to make it too difficult and he jokingly tells me to stop being an engineer about it. By now I realize my only choice is to look at how they did on the floor display models and go from there. We shake hands and I'm off to look at how "they did it".
Sure enough, the first display I look at has something notched, whether it's the cabinet face frame or the countertop itself I can't tell. Well that answers that one... So around the corner I go to the KraftMaid display to see how they did the surround panel. At first I can't see any evidence that the wall cabinet is mounted to the panel at all, and there is a gap! Wow. Floored. I end up having to pull the refrigerator out of the surround to see inside of it. Can you guess what I find? That spacer block I knew I'd need! Shaking. My. Damn. Head. Guess I wasn't making it harder than it had to be... Oh well, that one's answered too.
Looks like my timing was pretty good too. As I'm heading home from Lowe's, my phone starts with messages on Slack from work. I answer the one question as I'm sitting at the traffic light. The others are just "fluff" in the NSFW channel as we call it. Oh well, as much as I'd like to be done for the week already having my 80 hours and all, looks like that's not going to happen (again). Once home I make a few tweaks to my program at work I know I need to make to rule out something I could be doing wrong before presenting my findings to the customer. While I'm waiting on an answer to that, I mix up a batch of mud and get the first coat on the big eyesore I made in the dining room plaster.
Half an hour later and everything is cleaned up, but still no answer from the customer. With not much else I can do for work without that answer, I mix up another batch of mud and second coat the tops and midsections of the cabinet walls. This time though it takes a lot longer since most of it is just "touch up" so to speak. This coupled with the constant proximity to already set plaster seems to accelerate the setting time. Maybe I just worked it longer than the 45 minutes I should have. Dunno, but it sure took some doing cleaning the set plaster out that bucket! Unfortunately, I heard the chime of a Slack notification calling me back to work about halfway through that bucket. Then again as I was heading out to clean it and the tools.
This time the customer wanted some sample output, so I needed to make some changes to my code in order to provide it. It didn't take long, but long enough that I wouldn't be mudding anytime soon. I finally provide the samples they requested and am able to get back to the kitchen. This time I filled in the corner drywall better along with filling in the big chunk of missing plaster at the bottom by the baseboard. I'm still having problems with the plaster setting before I can use it all though. That's okay, because once I'm done cleaning up from that, it's pretty much the rest of the afternoon on Slack "dis""cussing" things that they are seeing that we aren't, now that they've fixed their code to actually send it.
By now, Nick is here and telling me Ann is already on her way home and that we need to figure out dinner, as in where we're going to meet her for dinner. Good thing I already cleaned up the kitchen so we can cook and put the dropcloths away and everything! That's okay, but I would have spent that time getting showered and cleaned up myself had I known. Beef O'Brady's is tonight's choice. Beer, beer, and more beer once we're home. Nick wants me to go with him to the maker space, but I have to beg off. He's insisting but I'm way too tired. Plus did I mention I've been drinking? Last thing I want to do is go operate heavy machinery after I've been drinking. Even so, I'm still sore, even after a good soaking in a hot tub...
(Saturday - 3 March 2018)
Looks like all that cold weather and snow they were having in Flagstaff finally made it here. It's a bit
chilly this morning, around 65° inside the house, but no colder than yesterday morning really. Outside
is a different story though. Ann and Nick are off to meet up with Court and Es at the Apopka Lowe's. They
still have the truck they borrowed, when Es's transmission started acting up and his car had to go to the
shop. They need to get the two fence panels and new posts to replace what was knocked down by Hurricane
Irma nearly six months ago now.
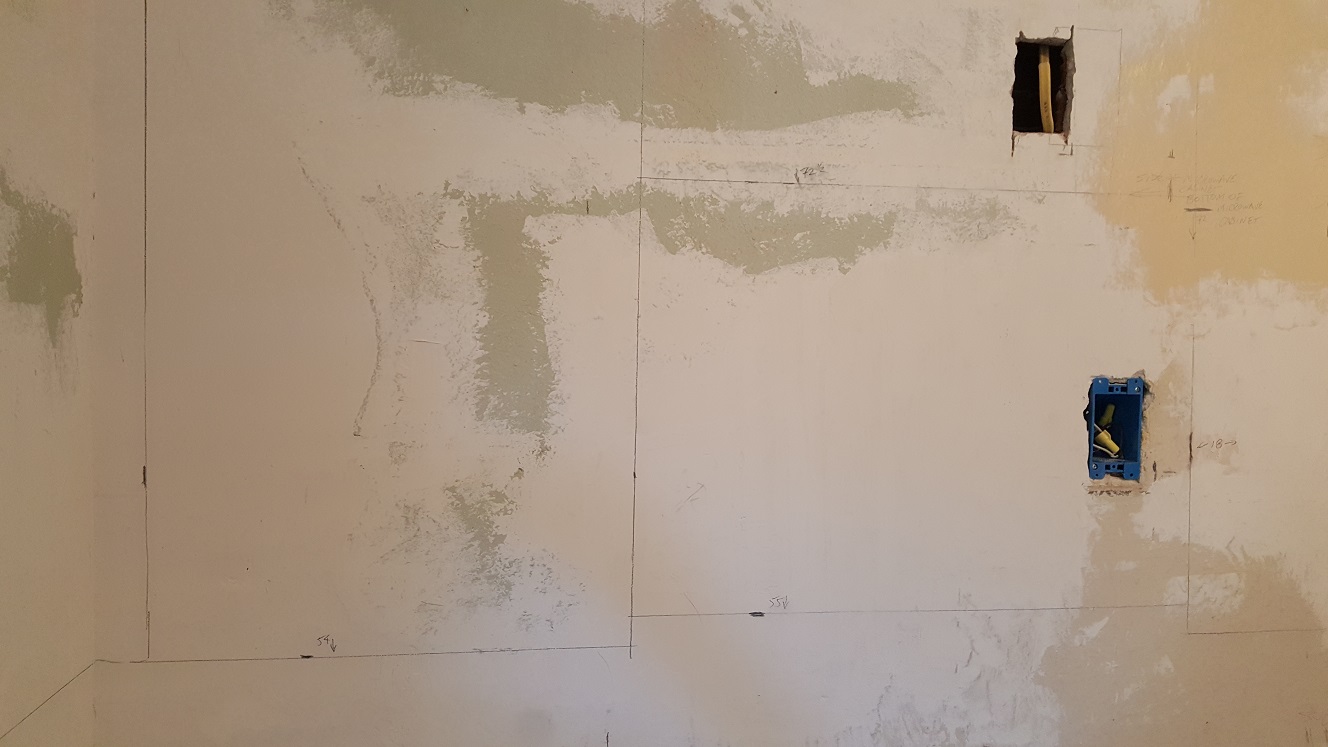
My task is to figure out where that outlet for the microwave needs to go so I can cut the opening and tie it into the stove outlet circuit. First I need to get that busted microwave back out of the box to get the measurements for the plug to properly locate the outlet for it. Armed with all the measurements I need, I end up messing around with it FOREVER trying to get it to go back in the box correctly. I wondered why the styrofoam that goes on top of it in the box was just laying on top of the peninsula cabinet box. Now I know. After finally figuring out the proper orientation of the microwave in the box, everything finally fit and I was able to move on with the task at hand.
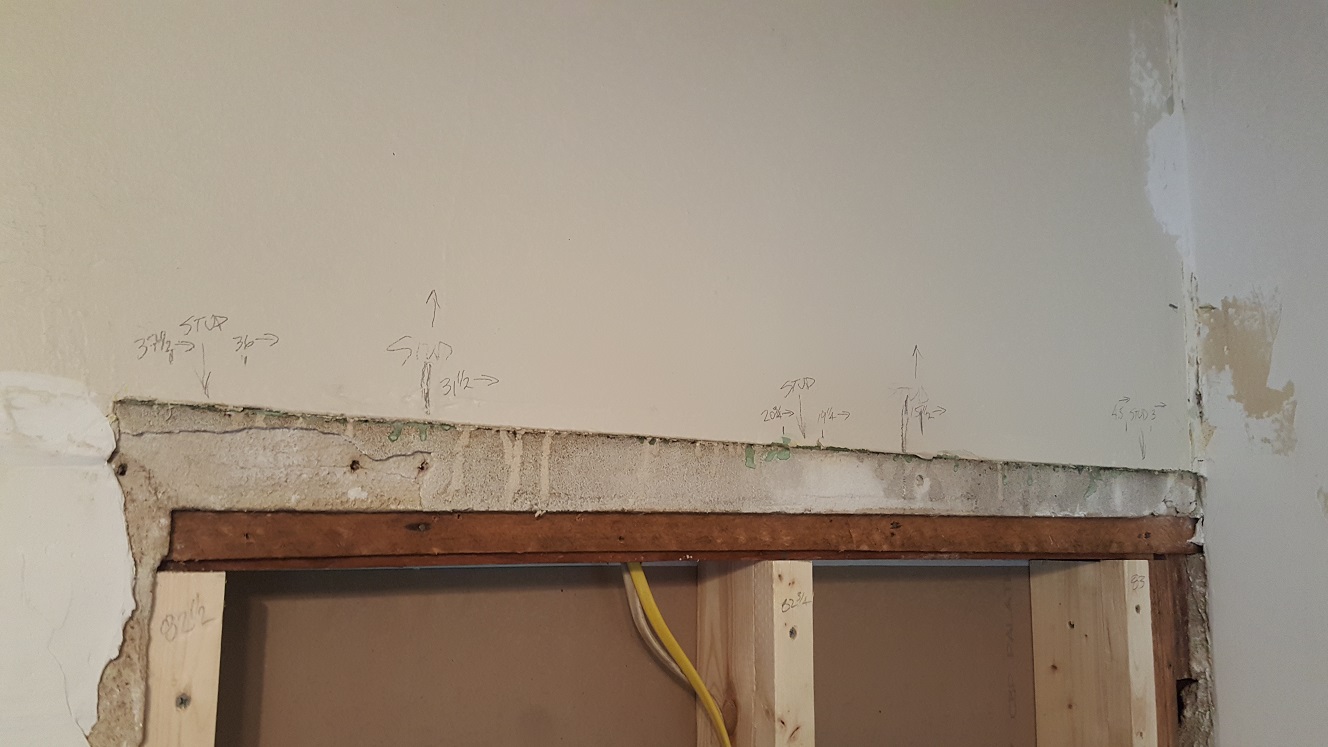
I also need to double check the cabinet itself to verify I have a good location. The face frame is 1½" tall, so I figure the closest I want the outlet cover to come to the underneath of the cabinet is 2", leaving ½" to 5⁄8" clearance inside the cabinet from the bottom. Just to make sure I'm not overlooking anything, I grab the installation book and templates to double check everything. Then I marked the wall with the cabinet and microwave locations. The bottom of the wall cabinets on either side of the stove start at 54" off the floor and are 42" tall, so the tops will be 96", or 8' off the floor.
The center cabinet over the stove that the microwave will hang from is 23½" tall, and the top of it has to line up with the tops of the two tall cabinets surrounding it, so the bottom of that cabinet will be about 72½" off the floor. The microwave is about 17½" tall, so the bottom of the microwave will be at about 55" off the floor. The plug will pass through an opening in the bottom of this center cabinet and plug into an outlet inside the back of it, the one I'm trying to locate. I think now you can see why I'm so careful about the placement of this outlet. I check the location of the cabinets with the stud locations and once I've convinced myself I have a good location, I locate the lathe as before and cut out the new opening.
Now that I have that other outlet over the counter moved, I just plug the stove into it and kill the breaker for the stove circuit. I locate the romex and pull it out of the new opening then realize I really don't want to wire up this outlet just yet, especially if I want the outlet box to sit flush inside the cabinet. It will have to wait until I'm ready to hang the cabinet and cut a matching opening in the back of it. So for now there's a new hole in the wall that will stay a hole in the wall until the wall cabinets are hung. That's it for the heavy mess making for today but I still leave eveything covered with the plastic dropcloths.
I mix up another bucket of mud and get the rest of the first coat on the dining room eyesore. It still needs a second coat, but at least the old plaster is covered again. With what I have left, I did more smoothing on the areas that will be seen between base cabinets and wall cabinets. This takes longer and keeps the mud in contact with that already set, again accelerating the set time of the mix. Another bucket with already set plaster to clean up! I'm thinking that next time I'm just smoothing with a skim coat like this, I'll only mix half as much to avoid the waste. But for now, I can live with the last bit of it setting before I can use it all up.
I mix up another bucket of mud and feather the corner drywall and fill in more of the baseboard area that was still looking pretty lean. As I'm using the last bits of it to do more smoothing up the wall it's starting to set up. Time to go clean up again. I'm now to the point that before I can do any more mud I'll need to sand down and smooth what I already have on the walls. Unfortunately, a quick search of the garage for the sanding block for the drywall sanding screens turn up nothing. I don't know if it's still at the other house or once again over at Nick's.
No matter, I have other things that will keep me busy until we can buy a new one and some more screens. I did manage to find a pack of 220 grit screens that I tried to smooth some areas with by hand. Besides making a lot of dust, which was mostly getting trapped between the wall and my hands, it really wasn't cutting the plaster down that quickly either. Time to put that off until I have the proper tools and a vacuum attachment. Back out to the garage to rip the 2x4s for the wall extension. Well, once I measured the size I would need and calculated what half of that would be.
It works out to be 4½" wide, making it 2¼" that I would need to rip them. I also measured the length to be 83½" but for some reason it's ALWAYS too long. I had already brought the pieces I ripped into the house, so rather than taking all four back out to the garage, I brought the chop saw to them in the kitchen. It was a good thing I did since the first cuts, ALL FOUR OF THEM, were not enough! After the second cuts they are good to go. First I screwed the smaller pieces in place, just covering the lathe. Then I screwed the larger pieces together and in place over the smaller ones. I had to cut out a piece of those silly stick on linoleum tiles first, but at least now I can cut the drywall and screw it in place.
I have two of the three pieces screwed in and am just finishing up cutting the third when Ann and Nick arrive with supper. I quickly screw in the last piece and clean up to eat. After supper from Tiajuana Flats (I can't ever remember that name!) I have just enough daylight left to get the corner molds in place and get a first coat of mud on the cabinet side of the wall extension. I wanted to get that up tonight so it will have over night to dry. That way, I can put a finish coat on it tomorrow if I want to and not have to wait all day for the first coat to dry. Wishful thinking, but at least it's an option I'll have that I wouldn't otherwise. Time to clean up and call it a day. Whatever I didn't finish by now will wait until tomorrow.
Don't forget the new sanding thingamajiggy
(Sunday - 4 March 2018)
Actually got to sleep in until 7:15. Ann and Nick are planning on moving the steps for Nick's pool deck out of
the way to do his patio prep. He wants to remove the patio blocks and just pour a slab. They talked about doing
it in three sections divided by paver bricks or something like that. We're already getting a later start, so
they're off to pick up breakfast while I'm updating this. Once we've finished our Mickey Macs, they're off to
Nick's and I'm off to the kitchen to get some pictures before I have none and nothing to show. I devote a bit
more time to updating this account and see it's snowing again in Flagstaff as I'm writing this. Time to get some
corner molding and mudding finished.
By now it's getting close to noon and just about the time I finish attaching the other corner mold to the wall extension, while I'm sitting there on the floor winding in the last screw, I realize I still need to take off that piece of baseboard left on the dining room side. Ann and Nick are back, and with the dog, and lunch this time! But I thought you were going to come over and spray the backyard while the dog stayed over at Nick's? Surprise! Change of plan since they already had most of what they could get done without another trip to Lowe's, where they are heading after lunch. Alrighty then.
After lunch I grab the putty knife, cat's paw, and pry bar and proceed to excise the thick paint and caulking holding all the baseboard pieces together. One by one off they come. First the cap mold, then the shoe mold, and finally the baseboard itself. I pound out the nails as the pieces come off. I'm not sure what's different about this dining room plaster compared to what I've already run into so far, but it certainly seems to have more sand in it and just crumbles at the slightest touch. The whole bottom part of that coat of plaster just crumbles off the wall and falls to the floor when I remove the baseboard.
Unfortunately, another round of loose plaster going halfway up the wall starts with the crumbling, sandy plaster mess that just fell to the floor. Much more plaster than I planned on patching today. I vacuum up the mess for the third time. The waste basket is full of plaster and the rest of the loose top coat mess and the shop vac bag appears to be full too. Just as I finish taking off the switch plate and outlet cover and prepare to mud, Ann and Nick are back from Lowe's with the new bag of mud and the shop vac bags I'll need. They're here just long enough to drop the stuff off, get the dogs stirred up, and leave. I empty the waste basket along with the full shop vac bag and put a new one in.
I could sand, but it's time to mud the new wall extension. The first batch fills the entire edge of the wall extension and part of the dining room wall where it's now missing plaster. I start at the top of the wall and worked my way down as far as the remaining mud allowed, which was not very far down the new corner mold on that side. I think I may have done myself a disservice by using the tapered edges of the drywall for the corner mold to mount to. In the past when I've used the metal corners, the joints always seem to angle out toward the edge, and I wanted to avoid that. The ones I'm using are some sort of plastic and don't seem to have as much of a bead as the metal ones do.
All I know is I spent a lot of time installing them, making sure the knife contacted the bead, as I ran in one screw at a time and checked again before running in the next. It seems that my careful checking wasn't good enough since both sides the knife is bottoming out on the fat edge of the drywall. Guess I have to add a bit more on the skim coat to cover it. Hopefully it won't crack along the seam between the old plaster and the new drywall where I probably should have used tape. The next bucket fills in the rest of the missing plaster and the corner on that side. With the small amount that's left, I put another coat on the now dry kitchen side toward the top. By the time that's all cleaned up, it's past 4:30, so really too late to start covering everything up just to sand.
I really wanted to get that cabinet wall ready for paint so we could hang the cabinets during this coming week, but that's doesn't look like it's going to happen if I don't sand them. Ann says to get in the shower so she can get showered next and we can go out to eat. Nick had already headed over to his house to shower, so looks like that settles that. We haven't been to PizzAmore in quite awhile, so... Best Supper Ever at PizzAmore. We even had dessert, which is saying a lot since we seldom ever have dessert anywhere, including at home.
The Second Stage Started, The Cabinet Wall...


More to come, so stay tuned...
The finished product will hopefully be well worth the effort and all the headaches.
<< Previous | Kitchen | Demolition | Plaster '70s Wall | Plaster Cabinet Wall | Wall Cabinets | Sink Cabinets | Plumbing | Plaster Sink Wall | Flooring | Cabinets | Countertop and Sink | Finishing Touches | Next >>