Our 2018 Kitchen Rennovation To The Nest
<< Previous | Kitchen | Demolition | Plaster '70s Wall | Plaster Cabinet Wall | Wall Cabinets | Sink Cabinets | Plumbing | Plaster Sink Wall | Flooring | Cabinets | Countertop and Sink | Finishing Touches | Next >>
(Easter Sunday - 1 April 2018)
Slow start this morning. We're all moving slowly, moaning and groaning, from everything we did
yesterday. Ann single-handedly planted the new maple tree she and Nick brought home the night
before last, not to mention planting all the new flowers and such, mulching, and making the
backyard even more inviting. Now she and Nick are off to get some breakfast sammiches, taking
the Brigel with them so he can have his too. I'm taking my time, updating this account, and
dreading the next step.
It's nearly 10:30 before I finally decide to drag myself into the kitchen and start disconnecting everything I was so happy to have connected yesterday. Kill breaker. Check. Unplug disposal. Check. Bucket under trap. Check. Disconnect trap. Check. Disconnect dishwasher drain line from disposal. Check. Disconnect disposal. Check. Turn off supply valves. Check. Relieve pressure... wait. Should have done that before I disconnected the drain. Oh well, you get the idea. The sink comes back off, the dishwasher comes out of the way, and now I'm disconnecting the electrical. With all of that done, the sink base is out the way too.
Now I can start on what I need to get done today, closing up that wall and getting a first coat of mud on it. By closing up that wall, I mean reattach all of the lathe that I had to take out to get access to the plumbing and attach drywall over it. I suppose I could just rip some shims the proper thickness and attach the new drywall over that, but all I have left is pieces of drywall, plus it's not like I could just cut one piece the proper size and attach it. Nope. This is a chunk for this space, and a different chunk for this space, and a couple here... I think you get the idea.
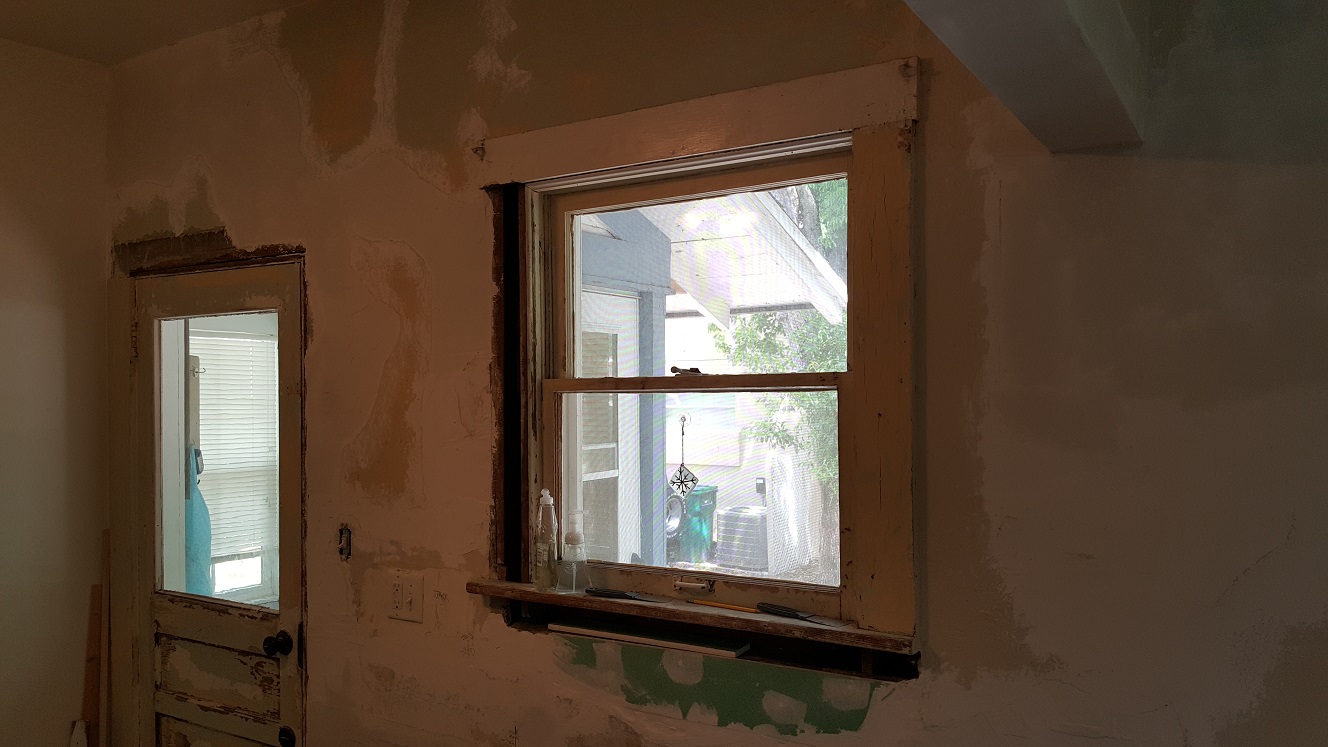
The other thing I nearly forget I need to do before I can mud the wall is assess the remaining bad spots in the old plaster around the door and window. I also need to get the window trim beneath the sill off so I can rip it a bit narrower (shorter) since Ann thinks it looks too wide. Like all the other places, the top coat has come loose from the base coat along that all too sandy layer between the two AND every place that someone previously disturbed it with a nail or a screw. There is one exception over the door where it appears a leak in the side porch roof along the side of the house has slowly worked its way down the wall and behind the plaster.
Again armed with a handheld wastebacket and the catspaw, I slowly remove all of the loose plaster. Then I turn my attention to the window trim, watching all the plaster behind it fall to the floor, as I pry the wood loose from the wall. Even with a strategically positioned wastebasket beneath, there's a lot of cleanup left to do. THe floor's a mess and so is the wall beneath the window, now missing all of the plaster, right down to the lathe. Good thing I remembered to do this before I did the drywall... Because now I'll need yet another large chunk to fill in this space as well.
While I'm here and have the catspaw, which is also very good at "scraping" paint, I use it to get beneath and peel most of the old paint off the door and window trim. I need to do something about it before the sink goes back in, where it will be in the way of doing it, at least easily. And once it's in permananently I don't want to be making a mess there at all. At that point it should all be done, maybe with the exception of permanent countertops until they're installed. When I've removed all the paint I can from the trim to the left of the window, I remove it as well since the loose plaster continues beneath it.
This sends yet another round of plaster debris to the floor, some of it making it into the once again strategically placed wasterbasket, but most of it finding the floor as before. While I'm at it, time for the trim to the right of the door and above it to come off too. Even more plaster debris, but now's the time to do it, before the mud goes on. And as before, the more of it that I touch, the more of it that falls off. While it's somewhat discouraging seeing how much plaster work I now have to do, it's also encouraging that once done, the plaster wall will have been preserved. And now at least I can move on to finally closing up that wall.
I figure as long as I have to pretty much custom fit it all back together anyway, I may as well restore the lathe so that if someone down the road wants to preserve the original plaster, they can chuck my drywall patches out and still have the lathe. I try to sort the pieces of lathe by size and where they fit, but it's like a big puzzle without a picture to go by. I do the best I can piecing it back together and thankfully I have a couple of longer pieces of lathe I saved from when I closed in the doorway. I'm able to cut these to fit nicely by the new drain and around the new electrical box.
I say this like it takes ten minutes... Three hours later and I'm taking a break to eat my big mac. Once I'm done eating McDonalds (again), it's back to it and fitting those pieces of drywall. Another advantage of putting the lathe back is I don't have to shim out the drywall to match the existing plaster profile. Most of this will be behind the cabinets, but the part that will show above the backsplash should look nice at least. Another wall to mud, but will I have time before the big Easter dinner? I'm sweating it as it comes down to getting the last pieces of drywall in place with half an hour to spare. Just enough time for a bucket of mud and cleanup!
<< Previous | Kitchen | Demolition | Plaster '70s Wall | Plaster Cabinet Wall | Wall Cabinets | Sink Cabinets | Plumbing | Plaster Sink Wall | Flooring | Cabinets | Countertop and Sink | Finishing Touches | Next >>
I sometimes think that I should include these pictures in the prose as I'm discussing them, but that always seems to cause more problems with the page layout. In the case of those below, I have a mix of tall and wide photos, which don't really play nice together, but share a common timeframe and theme. Here they capture the loose plaster removal process, the paint removal, and the trim removal, and were all taken within minutes of each other. Does that mean grouping them together looks right? Nope.


These photos capture closing the wall back up, from putting together the jigsaw puzzle of pieces of lathe to piecing the drywall together, culminating with the first coat of mud and putting the sink back in place, operational. The wide format they all share looks better, but gets too wide too quickly. How better to arrange these? I could use the CSS "float" concept and still struggle with inline layout issues. Maybe go the next step to a full up "bootstrap" row/col layout setup? For now I'm lucky to just capture the action while it happens, so I'll save all that for later... Forgive me.


In hindsight, perhaps I shouldn't have been in such a hurry to mud that wall, but I'm getting to the point of just wanting this damned project done. It's no longer a creative outlet. It's just a task that needs completed. I still have to do it right, but the energy to put in that extra touch is gone. I don't know if I'd feel this way if it weren't for this project taking all of my extra time or not, to where there isn't time to do anything else, but that's pretty much the size of it. I put on another bucket of mud, when I'm back from the most excellent Easter dinner feast, which closes out the plumbing rough in. Or should I say begins the plumbing nightmare?
(Monday - 2 April 2018)
Working from home today, and it turns out it's a good thing too. Big plumbing disaster... (sigh)
Ann bought one of those fill it yourself cups for the Keurig, and we've been using that rather
than break out the old coffee maker. It just seemed to make more sense since the garbage disposal
isn't connected and a little k-cup at a time rather than an entire basket of grounds shouldn't
need the disposal, right? WRONG! As I'm washing up my breakfast dishes this afternoon, the water
is backing up into the sink... Great. I'm thinking the garbage disposal has a plug in cord, all
I need is the extension cord. Run it to force the grounds down and we'll be good, right? WRONG!
All running the disposal does is stir the water up into a froth. Three tries. Three fails. The sink still has water standing in it. Damn. I knew just as soon as I mudded over that new drain this was going to happen. I debated whether to put in a cleanout or not. Some folks online highly recommend it while you're in there because you'll be cursing yourself when, not if, it ever clogs up. Well, they were right because I'm certainly cursing myself... Out to the garage for the box with the drain snake in it. Now I'm flat on my back under the side porch with the pipe wrench and the snake, removing the cleanout plug and running the snake through.
To my surprise, the plug comes out easily and the snake runs through it easily as well. The big surprise should have been no water standing in the drain line when I took off the cleanout plug. I guess I was hoping for the best, hoping the clog had freed itself in the amount of time it took me to get here beneath the house. WRONG! Somehow I already knew the problem was further up the line. So I pull the snake back out, clean it up, put the cleanout plug back in, take a deep breath, and move the snake inside. This should be fun... NOT!
Place a bucket under the trap, loosen the trap, allow the gallon of water to flow into the bucket, remove the trap, empty the bucket, remove the disposal, insert the snake, run until you're pretty sure it went the wrong way and is about to come out of the roof vent, repeat. Why is it the snake ALWAYS goes the wrong way when it comes to a sanitee? I finally manage to get the snake headed in the right direction, but it stops dead, like it's hung up on something. I wiggle and twist it until it seems to go past that something and a bit further until it stops dead again, and I can't get it to go any further.
I figure it probably hit the cleanout below or maybe the 45° bend just before it in the old cast iron. That should be good enough, and pulling the snake out, it seems "dry". That is, dry enough that it didn't seem to be coming out of standing water. I'm thinking that's got it, let's put this back together and test that theory... WRONG! Still clogged. Place a bucket under the trap, remove the trap, empty the bucket, remove the disposal, insert the snake. Nope. Still hitting some obstruction, but it seems to go further this time before hitting it. Still hoping for the best I put it all back together and try again.
WRONG! Still clogged. Place a bucket under the trap, remove the trap, empty the bucket, remove the disposal, insert the snake. Nope. Can't get the dmaned thing to head in the right direction to save my life this time. That settles it, time to tear the wall back out. (sigh) Yep. That's right. Tear out the wonderful wall patch I was so happy to have a first coat of mud on yesterday. Thankfully the mud is still fresh and a bit soft and all I need is a screwdriver to remove it from around the pieces of drywall. Then I find the drywall screw heads and back them out. Most of them anyway. I'm to the point of really not giving a shit at this point.
With the big piece of drywall off, I can see I'll need to remove one or two of the skinny strips by the door as well, just to be able to remove the few pieces of lathe to give me access to the fernco no hub connector. This is really going to suck. Now that I finally got this thing to stop leaking, let's take it all back apart again, just to run a snake through it and probably ruin the rubber sleeve while we're at it. I grab the proper socket and wrench from the tool kit and loosen the band clamps enough to see the six inches or so of water still standing in the pipe start to leak out everywhere. Wonderful.
When the water finally stops, I manage to roll the rubber sleeve back easily enough, but not enough to fit the snake in the opening. So I manage to stretch the rib of the rubber sleeve up and over the new plastic pipe and manhandle the old cast iron piece to where I've probably broken one of the joints below loose, but at least I can finally get the snake in there. I can see the water still standing at the lip of the cast iron pipe. So now I'm thinking back to when we crushed the pipe and had to go lower to get it to snap, and even then still had to get the cutoff wheel after it to clean it up. I'm wondering if a piece of the cast iron fell down into the pipe and somehow managed to block it.


The snake is definitely hitting something and stopping before I get it very far, so something is in the way. Wiggling it doesn't seem to do much. Neither does twisting it. A more vigorous jamming it up and down doesn't seem to do the trick either, but I can't see shit, so let me stop and go get the flashlight. The one that should be under the sink but needed charged and is still sitting at the other end of the house. Nope. I can still see water, albeit about three inches lower now. After some more vigorous jamming it up and down and all around it seems to have moved whatever it was out of the way some...
I continue to push and it moves whatever it is to where I can feed the snake fairly freely now and the water's gone! YAY! Problem solved for now. Time to pull the snake out and get this buttoned up. Yeah, that snake is definitely going to need hosed off before being put away. I just coil it back up in the box for now. I wipe off the lip of the cast iron pipe and roll the rubber sleeve back in place, making sure the rib is between the plastic and cast iron pipes where it should be and the pipes are properly aligned, then slide the metal sleeve over it and tighten the band clamps.
Now for the moment of truth... Did I actually fix the clog or just move it further down the pipe? With the disposal and trap in place, I turn on the water and let it run... and run... and run. That appears to have fixed it. I continue to let the water run while I check for leaks around the joint I just had apart. It all looks good. I'm reluctant to close the wall back up though, to say the least! Time to clean up outside and get everything back together and put away. The snake gets the rinse it needs and put back in the garage. The lattice work is back in place and the '70s wall panel is leaning against the side porch.
Yes, that's right. Even though we saved it for Courtney, she apparently forgot all about it, or didn't want it all that bad to begin with. Who knows? I've been using it as a really nice "mat" to lay on when I need to get under the side porch. Much easier on me than the dirt and sand under there. Eventually it will go out for the trash. It is all that remains though and it seems kind of sad in a way. That was a previous owners' kitchen remodel, and I'm sure they were as proud of it and as happy with it as we will be with ours when it's finished. Now it's just trash to be put out to the curb.
As much as I hate to, I put the lathe back over the connection and the drywall back in place. The coat of mud will have to wait. It's already 4:30 and I need to get in the shower so I'll be clean for supper, where ever that is tonight. Even then I don't think I'll feel clean, considering what I've been dealing with, but at least it's fixed. It does set me back though. I was really hoping to have the first coat of mud on the entire wall by today, not tearing out what I'd already done.
(Thursday - 5 April 2018)
They came and picked up the piece of shit microwave I accepted, so for the ultra low price of $200
they'll ship it back so I can get the other $200 I have in it back. What a f...ing racket! Twice
they delivered a smashed and broken microwave, the first time with a smashed and broken stove!
Unfortunately, I missed the damage the second time and now I'm paying the price for not taking the
f...ing thing out of the box and inspecting every square inch of it.
DO NOT EVER ORDER ONLINE FROM GOEDECKER'S!!!
The prices may seem like a great deal, but you'll have to put up with delivery after delivery of broken appliances until you get one that isn't smashed, if you manage to get one that isn't smashed. To top it off, these clowns were supposed to come tomorrow morning, not tonight during supper! Total f...ing @$$holes with no regard for the customer. Gotta love how when the guy puts it on the back of the truck, he drops it and the entire box rolls over. All this after three weeks of back and forth with them via phone and email. We're going to charge you half of what it cost you for this broken piece of shit we delivered just to get any money back.
Reminds me of that Dave Chappelle skit about customer service... "Why treat the customer this way? Because F... 'Em! That's why." We ended up ordering the same one through Lowe's and got a good one the first time!
(Friday - 6 April 2018)
Working remotely. More mud? Maybe. More whining? Probably. Splitting this page up? Definitely! Courtney
came out to visit us tonight and we went out to dinner at Mt. Dora Pizza. We really have to try the Pizza
Train now that we've tried the restaurant version of it. She and Ann spent some time out in the back yard
with the dogs playing ball. Then they came in and Courtney explained her new Tarot cards and gave us a
show and tell of her kit bag full of paint pens, regular pens, mechanical pencils, and such. The tools of
her trade so to speak. We had a pleasant time together, then she was off, back home.
Needless to say, between coming up to speed on a new project at work and Courtney's visit, nothing more gets done in the kitchen. That's not a bad thing either. Tomorrow will (hopefully) see the end of the bare plaster walls, final coats of mud, and even coats of primer and paint. Ambitious? Yes. Possible? Maybe. A lot of work? Definitely! So these next photos are kind of a started with, ended with style grouping. The first two are the temporary stove and sink accomodations before all the heavy duty demolition on the sink wall. The last two the latest accomodations after all the latest demolition and a first coat of mud over the entire wall.
These weren't taken within minutes of each other, but show how little evidence of all that work can be seen between shots. The addition of the pennisula cabinet is really about all that stands out since the cabinets block the view of most of what changed. You can make out the new drywall beneath the window, but because the first shot has the window trim still attached, again there isn't much difference to be seen. Oh well, I know it's there, and I know what it took to put it there. Maybe that's just part of the wanting it done thing too, not seeing much difference for all that work.


(Saturday - 7 April 2018)
Getting started kind of slowly this morning. Maya has me awake starting around 4:00 AM with her whining and
fussing. Every time I'd fall back asleep, she'd wake me up again! I yelled at her a couple of times to be
quiet, but finally around 5:30 AM or so, I think she woke Ann up too. She let both the dogs out, and Maya
drank and drank and drank, then finally went to do her business. That let us go back to sleep until about
7:00 AM. So I'm sitting here finishing my second cup of coffee, already dressed, thinking it's time to put
the laptop away, make another cup of coffee, and get busy. And by make another cup of coffee, I mean load
up the keurig thingy with another cup's worth of grounds and make another cup of coffee.
And by get busy, I mean get busy mudding... Mud, mud, and then more mud. Did I mention mud? Yeah, that's about the size of it. I start by mixing up a gallon sized batch, then another, which barely fills in the rest of the bare plaster. I want to get that much done to allow it the most time to set, hoping that even with having to add another coat early tomorrow, it will be dry enough to prime and paint later tomorrow. As I said before, it's an ambitious plan, but we won't know if it's possible unless we try. In any case, it's time to sand the rest of the plaster that can be finish coated next.
Ann helped me move the pennisula cabinet back out of the way earlier and covered everything up before she headed out to the grocery store. Meanwhile, I'm hand sanding, or rather screening, the previous coats of mud in anticipation of final coating the dining room and the opening into the dining room. It's slow going and I wear out about as quickly as the sanding screens do. I sit down between screens and take a break to catch my breath, then back at it. I've been flipping the screens over to get the remaining use out of them, but these aren't the 3M ones, I'm out of them. I go through three screens, front and back, just to do the stretch I want to put the finish coat on.
With that done, it's time to disconnect the sink again and get it out of the way. Just about the time I'm ready to mix up more mud, Ann is home from the store, so I have to wait a few more minutes. It feels good to sit down... Alright! Break's over. I'm debating whether to mix up a full batch of mud or just half. I've noticed that the mud starts to set up much quicker when I'm finish coating, perhaps because of the near constant contact with the already set mud, so I'll usually mix up just half of that so I still have a fair amount of working time and not end up with a hardened mess in the bucket.
This time I figure I might as well make a full batch since I still have the large voids where I had to tear the drywall back out to snake out the drain. Concentrating on the area I want to finish coat first, I get the whole bucket applied, but it was really starting to harden, so I just made it as far as working time. The next two are half batches and they give me plenty of working time. I'm ready to say that's it for today, but then I realize I've forgotten to get those low spots on the dining room wall I circled! Alright, one more half batch, then I'm done.
I get those low spots right away, then shift my attention to trying to better level the area between the door to the side porch and the sink, the area you'll see above the countertop that is. There's still quite a bit of "wave action" between the electrical boxes, but hopefully I can sand those smooth tomorrow and just fill in the low spots. That entire wall that the sink sits against will need another coat, and probably not the finish coat either. Again, I was really hoping to prime and paint that wall, but we'll see what happens tomorrow.
(Sunday - 8 April 2018)
So we're up earlier today, about 6:30 AM, but we're taking our time getting moving anyway. The sooner I
get started on the sanding and mudding, the better. As tired as I feel this morning, it can wait a bit
longer. What I got done yesterday is looking good, but now that I can see what I missed and what still
needs mud, we'll be pushing it to paint today. Again, we'll see what happens...
Ann is already asking me what I need from Lowe's this morning, but giving Nick a chance to wake up on his own terms. He was at a car meet over in Daytona all day yesterday. When he got back later yesterday afternoon, he just plopped down on the couch and promptly fell asleep. The beach and the sun will do that to you. It seems to take it right out of you, but you don't feel it until later. Anyway, I'm already busy circling with the pencil, so I guess I should have put my work clothes on instead of my around the house clothes. It can wait a bit longer...
Soon enough I have everything covered and I'm sanding. And sanding. And sanding. I'm using the off brand fine, which they call 220. Compared to the 3M version, it looks more like a sieve than a screen, and what 3M calls fine is 180. The usage instructions on the mud say not to use anything less than 180. The 3M medium at 120 cuts real quick, and does tend to leave marks, but that's okay since I'm just trying to level the first coat for a finish coat or two. In any case, I thought we had more of the 3M screens, but can't find them if we do, so rather than sit around getting nothing done I use the off brand ones.
It takes more work and I go through them more quickly, but I think I finally have the opening ready for primer and paint. All except for that spot in the middle that looks like it's shallow or dented and needs another thick layer of mud added to make it look straight. If there is one thing I don't like about these plastic corner molds compared to the metal ones it's that they are too comforming, i.e. they more easliy bend and curve and take on the shape of what they're supposed to be squaring up. Again, it's my fault for not just adding a 2x4 or something like that to bring things back to square first rather than just relying on the drywall and shims to do it.
In any case, I notice that it sounds like the filter bag in the shop vac is full, so I check it and it is. Time to take that and the rest of the trash out. Now where are those new bags at? Son of a... I just can't stand it sometimes! I've looked everywhere twice and still can't find them! I must be blind. I text Ann and ask if she's seen them. Nope. And I've already looked everywhere she's suggested. I know I put them in a box with stuff I'm pretty sure ended up on the front porch, but I could be looking right at it and not see it. She says to just take a break, they're on their way back from Lowe's and she'll look when they get here. Guess I'll take a break.
Guess I needed that break because she found them right away in a box I looked in twice and didn't see them. All I know is this really gets old, but now at least I have the shop vac bag I need, and the good 3M screens they picked up while at Lowe's. Back to it, and this time armed with the medium screen I'm able to take down the high spots quickly and easily. Time for some mud. I'm just mixing up half batches now. The working time seems to be about half of what I would get if I were just applying to large areas without the previously set mud already there.
First I rig a "straight edge" along that "dent" in the underside of the opening using my 4' screed board and a set of quick clamps. That will give me a guide to follow when applying that thick coat of mud. The first batch of mud fills that and a second coat along the area beneath the window where the backsplash will sit. I have just barely enough to get a second coat over the chunk of drywall directly beneath the kitchen window. The second bucket finishes that up and the "bumpy wavy" area around and between the switch boxes and part way up the left side of the window.
The last batch second coats the rest of the way up the side of the window, over the door, and partially covers the drywall behind the sink base. That's about all I can do until it's set and dry. By now it's too late to think about priming or painting, let alone burnishing the mud to give it that plaster look and feel. I think I'm all done cleaning up and putting away until I notice my screed board is still clamped to the opening. I remove it from the wall and begin the difficult task of removing the now set mud along its length using my thumbnail and the hose. I takes some doing, but eventually it's clean and ready for its next task.
Meatloaf, broccoli, and mashed potatoes here? or was that yesterday? Pork (turkey) loin, carrots and broccoli, and mashed potatoes at Nick's? I really must be tired.
(Monday - 9 April 2018)
Even with the kitchen somewhat back online, we've been cooking and eating dinner at Nick's, tonight is quick and easy, BBQ sammiches and mac & cheese. While I had planned on doing a little here and a little there through the week, to be ready to do the majority of the floor work this coming weekend, I'm really not feeling like doing anything but sleeping tonight and neither is anyone else. We're in bed before 9:00 PM.
(Friday - 13 April 2018)
I actually get an early start this morning and we're able to finish up bug fixes in a couple hours. Then I'm back on the flight simulator project. Nothing like being able to play video games at work! I figure out the problem I'm having with the installer, and I'm ready to check in the changes, but I'm waiting until I hear from the customer . Nothing yet, so... Bug fixes it is.
The break in the action let's me gets started on preparation for rough sanding the mud. Everything gets covered, including the pennisula cabinet with top, once I've moved it and the table over and out of the way that is. The drier beeps, telling me my work clothes are clean and ready for me to wear. Next I have to disconnect the sink for the umpteenth time and move the sink base and the dishwasher out from the wall. This time I start with the medium 3M screen for some heavy duty removal of the high spots in the second coat. 3M calls it 120 grit, and again, the mud maker says not to use anything more coarse than 180 grit.


It takes down the high spots quickly alright, but it also leaves a definitive "screen" marking on the plaster itself. For the most part it doesn't matter since these areas will be getting a finish coat of mud to finish smoothing out the surface. There are a couple places I should have saved for the fine screen and it shows. Hopefully I can just hit them with the fine when I finishing out the finish coat though. I stop after I've used up the first side of the medium screen, ready to flip it over and finish the rest of the wall, when I hear the distinctive sound of a new Slack message from the computer. I finish up flipping the screen, wash my hands, and go check the messages.
I just ignore it until I hear from the boss about what direction we're taking. I don't hear anything from the boss right away, and it's lunchtime anyway, so it can wait. Back to screening. I finish out that other side of the screen, and still nothing from the boss, but I figure I'd better say something to clear up the "misunderstanding" about how things work now and how they're supposed to work (or used to anyway).
So I spend the next couple of hours trying to understand what's going on in the code, then explain what's happening and why. The boss finally prompts me to let him know we can take a look at fine tuning things. Well, letting him know we will take a look at fine tuning it sort of bypasses the issue and how to fix it for the time being. "Ok. Thanks."
Anyway, after the long back and forth via the Slack channel, I'm back to screening, sort of that is... Seems like no matter how hard I try to keep that stupid water filter from leaking all over the bottom of the new sink base cabinet, it still does, and I'm yet again mopping up a large puddle of water from the bottom of the new cabinet and the floor. I hope this doesn't hurt the plywood too much. It looks like they put these things together with LOTS of glue, so I'm betting that even though the water sat there longer than it should have, it's not penetrated through the finish and the glue into the wood just yet. Time will tell.
I go through another screen getting the plaster ready for the final coat of mud. I check back on the Slack channel. Nothing new, so I check in the changes for the issues and package it up for "distribution" to the customer. But first it needs more testing and I need to get this last coat of mud on the wall. Because the customer does not feel that source code control is necessary, "distribution" means sending "zip" files back and forth. Not going into all the details, but suffice it to say we already have a version control mechanism in place with a shared repository between us that we could be using and both sides would be running the same code. But that would be way too easy and make way too much sense ...
The last bucket of mud... I like the sound of that! Overall it won't be, but to finish out the kitchen plaster and paint, it is the last bucket of mud. It's actually another half batch, but the last bucket nonetheless. I already marked all the areas that need more mud with pencil. One by one I level them as best I can, leaving the wall behind the cabinets and dishwasher for last, skipping it for now just in case I run out before I get there since it won't be seen anyway. I do manage to stretch it enough to get that patch of wall though.
As I'm scraping the last of it out of the bucket, I just happen to glance up at the ceiling register and remember I need to fill there too! Damn glad I noticed. I've forgotten it EVERY time until now. I just manage to get the register off and the mud on before it finally starts to set. I clean up and put things away, quite pleased that this will be the last coat of mud. I'm hoping so anyway. Now to let that set up. I'm hoping that it will be dry enough to finish screening tonight, but that's probably pushing it. There are still quite few spots where the mud went on heavy and it's taking its sweet time drying. I take this opportunity to send the now tested code updates to the customer.
It looks like that's it for now, the mud is still wet in many places by the time Ann gets home, not quite two hours later. I'm beat. Somewhere in all of this Nick actually managed to get up in the attic and we got the new outlet to the right of the sink installed and working today too. Really hate looking back and trying to remember all of this. It should be just like it was yesterday, but instead I can barely remember anything... My Can't Remember Shit (CRS) is flaring up. All I know is I missed him this morning when he dropped off the IRS forms he printed for me, and it doesn't show up in pictures from the 7th, but it's there in pictures from today.


(Saturday - 14 April 2018)
Another early start, so prep for sanding what will hopefully be the finish coat of plaster in the kitchen!
Ann's off to get her hair done while I sit here and update this account, but it's time to get started...
And that's what I do. I connected the sink back up last night, so first thing to do is disconnect it
again. Everything gets covered again and it's time for the fine screens. I'm wearing them out quickly. More
quickly than the medium screens, but even so I have to be careful not to leave marks behind. I takes nearly
all morning to get it done, but it's done and ready for primer!
Almost. I really need to burnish first. Armed with the spray bottle and my 4" knife, I start on the dining room side and work my way across the opening into the kitchen, alternating between the kitchen and dining room, until I reach the sink wall. Then I work my way from the rest of the sink wall in the dining room into the kitchen, all the way over to the '70s wall, saving the parts that will be hidden behind the base cabinets and the dishwasher for last. It doesn't take long, not even an hour, but it's going to take longer for it to dry. I run my fingertips along the place I started in the dining room. Man does that feel smooth! Nothing like that chalky, powder like texture you'd expect from drywall mud.
Ann was originally going to primer and paint, but she needs to go help Nick with his tree trimming and other yard work first. She just got done mowing the lawn, doing that and weed whipping while I was screening and burnishing, again waiting for the walls to be ready to prime. We decide she should go help Nick while I get started priming. Then she can take over when she gets back. She gets me set up with the "implements of destruction" before heading out and I get started. Nothing like trying to pour a brand new gallon of paint into the paint tray without making a total mess...
I start in the dining room and work my way across the opening into the kitchen, finished with the dining room side and getting to the inside top of the opening in the kitchen about the time Ann gets back, leaving pretty much the rest of the kitchen sink wall and what still needs done of the ceiling that we didn't get to when painting previously. I finish up that wall and let her take over. She's making great progress until she gets to the ceiling fan...


She wants me to take the fan down, or at least take the blades off, just to get it out of her way. Taking it down will take time, time I don't really want to waste. It will also mean killing the kitchen lighting power, but Ann's already complaining about the poor lighting anyway. So I agree to taking off the blades, thinking that will be easy, until I see the screws for the blade mounts are pretty much covered by the light kit and I'll have to kill the power anyway. Great. Let's see about getting to the screws that hold the blades to the mounts... Yeah, right. They have what looks like a phillips head but are a solid part of the blade mount?
Then I notice the blades have large rubber grommets that aren't catured by any hardware. Hmmm, I wonder... Sure enough, they just press fit over the heads on the blade mounts. Wow. Snap on, snap off. Nice. There. The fan blades are off, but of course Ann is pissed because I asked her if she really wanted those off of there right after she finished priming and the ceiling is still wet. Guess I can't do anything right. I know my timing is impeccable. In any case, it's time for a break to let the primer dry enough to apply the first coat of paint.
When that time comes, I let Ann handle it because I'm beat. All the screening and burnishing caught up with me quickly.
Ann doesn't like the looks of the short dining room wall with all the roughness of the old plaster right next to all the smoothness of the new plaster, but it can wait until I fix the plaster on the wall of the far side of the dining room and the hallway.
(Sunday - 15 April 2018)
Slept in until 7:00 AM. Need to get on the ladder out front and clear the leaves and debris off the front
porch roof before the rain gets here to test my theory that it's causing the water to back up under
the shingles causing the leak we're seeing in the living room ceiling all of a sudden. I grab the 8' step
ladder and the plastic rake to get started. I set the ladder up where I need it and climb it, armed with
the rake, which is too short to reach any of the debris sitting on the roof. Change of plan. I'll need a
handle extension...
Heading back to the garage to look for something that will work, I spy the old broom leaning against the house by the side porch, the one with the handle that's recently become loose. I wonder if I can get it... Yep. The handle comes out with a couple twists. Cool. Now I'll need some way of making this an extension for the rake handle. A few wraps of duct tape should work. Hmmmm, kind of rickety. Another band of tape takes care of that. Back up the ladder I go, armed with my new "extension rake". I still have to sort of "toss" the tines in the air toward the debris and hope it lands about where I want it to go.
After a couple of tries and near misses, I decide to get up on that last step of the ladder before the top, you know, the one they warn you not to stand on or above. The first toss gets the rake about where I want it to, but doesn't quite reach the top of the debris. The next toss about topples the ladder and me with it. Will have to be more careful next time. I make sure I brace myself against the roof with one hand and toss the rake with the other. I'm able to clear most of the debris off and over the edge of the roof. I head back down the ladder to get the blower and blow the rest of it away.
Yeah, right. Even with the turbo button, it only "shoots" about 6' from the end of the nozzle, not far enough to reach, but no matter because a gust of wind comes along and blows most of it away! Better than I ever could have anyway. I head back down the ladder satisfied that there is no way that small amount of leaves and such could have ever caused the leak to begin with, but just to be safe, it's gone now. So while I'm wasting my time doing that, Ann is already applying the second coat of paint. It takes a while, but she's done by around 9:30 AM, and now the question is can we hang those wall cabinets?
Yes we can, but first we need to let the paint dry. And get the sink and dishwasher out of the middle of the kitchen floor and out of the way. And let the paint dry. I wish I would have written more down sooner, because I'm really having trouble remembering it now, only a few days later. Probably because we were at each other's throats about needing Nick's help and I'd rather just forget it than not. What a fiasco! Anyway, it's over and done with now, but it was a real shouting match there for a minute or two...
So once everyone is ready to cooperate again and get started on hanging these wall cabinets, we start by planning what it is we need to do to hang these wall cabinets. The recommended installation procedure is to move the base cabinets out of the way to gain better access, but we figure the easier way to get these cabinets in position is to make a "jig" of sorts to hold the cabinets up off of the base cabinets such that one of us can spot it while the other operates on it. By operate, I mean either spotting the holes or winding in the screws, maybe even checking the placement of the outlet cutout for the microwave.
Before we can do any of that we still need to locate the wall studs and mark them. Once I decide we're going to center the entire mess of cabinets, I start measuring and marking the layout of the cabinet placement on the wall. Now we'll need to figure out what that "jig" is going to look like and make it. Because the floor isn't level, the base cabinets aren't level either. I shim the one to the right of the stove with a chunk of leftover ¼" beadboard so now it's level, but it's a ¼" taller than the one on the left. I figure I'll make the jig the shorter of the two and just add a ¼" shim to the side that needs it.
While Nick heads over to his house to retrieve the trim screws I loaned him, I cut a few chunks of 2x4 to size, one 18" and two 19". I'll screw them together into a "U" shape, but I'll need the quick clamps to hold them while I do. I mark where I think they'll meet and go to clamp them together but can't seem to make the clamps work in this configuration. Scratching my head, knowing I had visualized this and wondering why it isn't working, I proceed to just hold them by hand. After all, it doesn't need to be perfect, it just needs to do the job. All but one screw from done, I realize the reason why the clamps weren't working... I'm putting it together wrong! The clamps would have worked had I put it together correctly!
No matter, Nick's back with the screws and we're just about ready to hang the first cabinet. Now I'm looking for where I read that we need certain sized drill bits and hole placement and what screws go where, but I can't remember where I read it, let alone where I put it when I was done reading it. The only thing I can find is the instruction sheet for the "lazy susan" gizmos in the pennisula cabinet, and it refers to page 6 in the rest of the installation manual? What installation manual? Nick to the rescue with the online installation guide PDF. It says to drill the 3⁄16" holes ¾" from the inside top and bottom.
So now I'm thinking the drawer and door pull kit has a 3⁄16" drill bit in it, but Nick reminds me they bought me a whole new drill bit set when they got the rest of the assorted sized bits I'd need, along with the sanding screens I didn't think we had any more of... I'll need that pull kit soon enough, but let's get the cabinets hung first, shall we? The new drill bit set is of your typical "Chinesium" quality, i.e. even though the "drawers" are stacked, the kit doesn't open without a struggle with something caught on something else, or just poor construction period. It doesn't matter as I soon have the 3⁄16" drill bit and I'm measuring how far in from both edges inside the cabinet I need to drill the holes.
I made up a ¾" gauge block from a little chunk of scrap wood because I know how difficult it's going to be trying to read the measurement from the end of the tape measure where most everything is obliterated by the edge clip. I'm sure glad I did because it's hard enough just reading the tape measure anywhere. So the first tall 42" cabinet to the left of the stove is drilled and put into place sitting on top of our handy "jig". Nick spots it while I mark the locations of the holes with my spring loaded center punch. We take the cabinet back down and I drill through the plaster at the marked locations with a masonry bit until I'm hitting wood, be it lathe or the stud itself.
With the 42" cabinet back in place and Nick spotting, I wind in the top screws, then the bottom ones. I leave them loose enough to allow connecting it with the face frame on the center cabinet when the time comes. Once all of the cabinets are in place and connected at their respective face frames, then we can tighten down the whole assembly. So that's one, and it's only slightly off the mark to the left, not even a sixteenth of an inch. Now the hard part. Getting the hole for the outlet for the microwave marked in the center cabinet and cut to match the one already cut into the wall. But first the doors need to come off. I lean them against the '70s wall, the left one to the left of the surround wall and the right one to the right of it.
I start by measuring, marking, and drilling the mounting holes. Repeat for the outlet opening, except I drill holes back from the four corners of the opening to allow some "wiggle room". We put the cabinet in place, using quick clamps along the face frames on the left side and a piece of the window trim that's almost the right length, and is with a half inch spacer block under it, on the right. Nick spots it while I center punch the mounting holes and probe the outlet opening. Looks like we may have to adjust to right a "smidge". We take it back down and I'm cutting the back "laminate" with a razor knife... I thought we paid extra for ALL PLYWOOD CONSTRUCTION?!?!? So what is this cardboard shit with an ultra thin wood veneer on the back of the cabinet? Doesn't look like any plywood I've ever seen!
Anyway, I keep making thin cutting passes over the "laminate" until I'm pretty much through. Nick asks me if I'm using the dremel saw to cut through the wood and I'm wondering what he's talking about. Then I realize he means the wood framing brace along the bottom of the cabinet. The one I should have taken into account when making the hole in the plaster... Oh well, it's only about half an inch that needs to come out, by about 2" wide for the outlet box itself. The dremel saw blade must be dull, or maybe that's just the way it cuts, but it sure is making a LOT of smoke! Nick pulls his shirt up over his nose as a temporary mask. There, that's done. Back to the wall with it.
We set the cabinet back in place, again with Nick spotting, as I try to fit the deep old work box in through both holes. Looks like it's hanging up on the lathe in the wall opening now. Back down it comes whlle I get back up on the ladder and try to cut back the lathe a bit. It's a good thing Nick suggested we cover the base cabinets and the stove with a dropcloth earlier, because now they're covered with more of that loose top coat plaster from around the opening in the wall. Wow. I'm amazed at how much plaster just fell off the wall. Good thing it won't be seen once the cabinet and microwave are in place because I don't to take the time to mix up some mud to fix it.
It seems like the more I mess with it, the more of the plaster I disturb, but eventually get the box to fit the opening. We put the cabinet back up, and this time everything fits, so the top screw goes in. Then the bottom screw. Then the face frame gets drilled and the trim screws installed. I'm having some trouble with the bit wanting to skip, and on closer inspection, it looks pretty well worn out. Nick says hold on a second, then returns with one of the long shaft bits that fits in the fancy screwdriver he bought for Ann. Perfect! A brand new #1 robertson (square) drive bit. I ask Nick if he thinks we should do the outlet for the microwave or just keep going?
We both agree, finish hanging the cabinets, then worry about the outlet for the microwave. This last tall cabinet is being persnickety. It's the one where we shouldn't need the shim for the jig, but it appears the jig is just a bit too tall, so Nick has to tilt it just right to get the correct height. With the cabinet in place, I'm still having trouble getting the face frames clamped, so decide to wind in the mounting screws first, then worry about lining up the face frames. Now Nick is able to just spot the cabinet while I drill and screw together the face frames. With everything tied together, I go back to tighten the mounting screws down and promptly snap one right off!
I knew that was going to happen! I drill a new hole just below the old one and wind a new screw in, this time with the torque correctly adjusted. The rest of them snug right up and we're done hanging the wall cabinets. Well, done hanging the ones we can without having to take them back down to finish the floor that is.
I open up the microwave box, grab the installation instructions and the drilling templates, and sit down with them to have a look. I had already done some rough measuring and such with the package from one of the busted microwaves, but this time it's for real. I'm looking specifically for the wall mounting template and bracket. I end up having to take the microwave entirely out of the box and set it on its side since the bracket is held to the microwave by the bottom two case mounting screws? Wow. Different. I grab the package of hardware, with the lag screws and toggle bolts for the mounting bracket while I'm there.
I'm folding the template to fit in the space that the microwave will soon occupy, sliding it into position and marking the hole for the lag screw into the stud. I almost setup to drill for just one toggle bolt, but for some reason read the instructions again, and it's a good thing too. It says to use two toggle bolts, evenly spaced on the other side of the stud. We probably could have gotten away with just one, considering it will be mounted to the wall cabinet above as well, but what the hell? They gave us two, might as well use them. Better safe than sorry? I determine the even spacing and mark the spots on the wall with the punch.
First I grab the 3⁄16" masonry bit for the lag screw and go until I hit wood, then I grab the 3⁄16" wood bit and drill into the stud. Next I grab the 5⁄8" masonry bit for the toggle bolts and drill through the plaster until hitting the lathe for both toggles. Last I grab the 5⁄8" wood bit and finish the holes for the toggles. By now Nick is back and watching me trying to tighten the toggle bolts. I've already run the lag screw in loosely to hold the bracket in place while I snug down the toggles. If you've ever installed a toggle bolt, you'll know what a pain it is to have to keep pulling on the screw to hold the toggle part against the back of the wall while trying to tighten that same screw by pushing on it with a screwdriver.
It goes fairly quickly though and soon the bracket is mounted firmly to the wall. All that's left is drilling the holes in the bottom of the cabinet for the mounting bolts and the plug. That and installing the outlet itself. Once again I'm folding a template to fit, but they want you to tape it beneath the cabinet rather than laying it inside the bottom of the cabinet? Dunno. I make sure the holes for the mounting bolts are pretty much in the same place on both side of the sheet. It's convenient to have another copy for another language on the back. Now I can just make a hole underneath where the 2" hole goes for the plug and just mark the location from the top, inside the cabinet. Much easier than trying to tape it underneath and twist all around just to see it.
I mark the hole locations with the punch as before and head out to the garage for the 2" hole saw I'll need from the hole saw kit I put away prematurely. The mounting bolts call for a 3⁄8" bit, which is amongst the collection of bits I had Ann and Nick buy just for this part of the project. I double check the locations of the mounting bolt holes against the microwave itself and compare them with the dimensions of the cabinet. Everything looks good, so I drill them and the 2" hole. I ask Nick if he can spot me on the microwave lift and install, and he says sure, but asks if I'm going to use the spacer blocks they recommend to keep from deforming the top of the microwave and bottom of the cabinet.
I hadn't planned on it, but I thought they were talking about blocks that may have been part of the cabinet construction, not pieces to be cut and added to its construction. I ask him to check whether the vent setup on the microwave is correct while I make a quick trip to the garage to rip a couple of chunks of ¾" thick spacers and we're ready... Well, once I drill the proper holes through them we are. I lift the microwave from the front porch and carry it into the kitchen and lift it into position as Nick guides me. I land the back of it on the mounting bracket first try! Nick pulls the cord through the hole as I rotate it into position. He stops me to position the spacers and holds them in place using the mounting bolts. He screws them in and tightens them down. There! Done! Well, except for the outlet that is...
Nick is on the outlet install and I'm sitting down in the living room to take a breather. I was worried we wouldn't have enough wire without getting into the attic to free some up or moving out the stove and pulling a new feed down to the existing stove outlet from above. He's struggling with how little wire he has to work with and the deep box. Next thing I know he's getting up the attic to see if he can pull any extra wire down. He manages to find some extra, enough to get it done anyway. With the outlet and cover installed, I flip the breaker back on. No pop and the stove beeps. That's a good sign. He plugs in the microwave and it comes to life too. Ann's out there admiring our handiwork and Nick asks for a cup of water to test with. Yep. Water's hot and the breaker didn't pop. That's a very good sign!
Next I grab the box with all the extra hardware that came with the cabinets, looking for the 86° hinge restrictors before we mount the glass doors to the tall cabinets. I don't want them hitting the wall and breaking before we even get to use them! Well rats! I thought the little bag that had the restrictors in it had a bunch of them all tangled together. I should have looked more closely when we first got the cabinets... There are only four? I can think of at least ten doors that will need them, one per hinge, and these tall doors alone have three hinges each. There has to be more of them. Did I put the rest of them somewhere and just don't remember doing anything with them?
Ann's already online ordering extras. They'll be here Tuesday. That's good to know, but for now I grab the left door and install two of the restrictors, one on the top hinge and one on the bottom hinge. Now I'm wondering where are the screws to mount the hinges to the cabinet? I'm looking in the box of hardware and not finding anything when I happen to look down at the styrofoam padding on the box the door came in and spy two screws stuck to it. And another two on another piece. Well, they gave us an extra at least...
With the door laying in my lap with the top hinge open, I drop one of the restrictors in and close the hinge to seat it. Repeat for the bottom hinge. Don't know if the middle hinge will need one or not. I spot the door while Nick runs the screws holding the hinges in place into the cabinet. That's one. Repeat for the other door, except this time there's only two screws in this box. Guess that wasn't an extra screw like I first thought. Oh well, at least we have enough. The center cabinet doors go back on next and then it's time for pulls.
I grab the bag with the pulls and the install kit, then go looking for the 3⁄16" drill bit that goes with it, the one I took out thinking I needed it for drilling the mounting holes in the cabinets. Thankfully it's still sitting on the table next to my recliner where I left it. With the door template in place, I drill 1⁄16" pilot holes in all six doors, including the two in the huge cabinet still sitting on top of the refrigerator. It's actually sitting on 2x4s sitting on top of the refrigerator, but that's only because we can't mount it to the wall just yet. I follow up the pilot holes with the correct sized holes and one by one the new pulls are installed.
So now we're adjusting the doors up and down since the pilot holes in the right hand cabinet are such that they limit the upward travel of the door to where Nick has to adjust the center cabinet doors down to match the highest we can set the right hand glass door. No matter. That much is done!
Done. Done. Done!


More to come, so stay tuned...
<< Previous | Kitchen | Demolition | Plaster '70s Wall | Plaster Cabinet Wall | Wall Cabinets | Sink Cabinets | Plumbing | Plaster Sink Wall | Flooring | Cabinets | Countertop and Sink | Finishing Touches | Next >>