Our 2018 Kitchen Rennovation To The Nest
<< Previous | Kitchen | Demolition | Plaster '70s Wall | Plaster Cabinet Wall | Wall Cabinets | Sink Cabinets | Plumbing | Plaster Sink Wall | Flooring | Cabinets | Countertop and Sink | Finishing Touches | Next >>
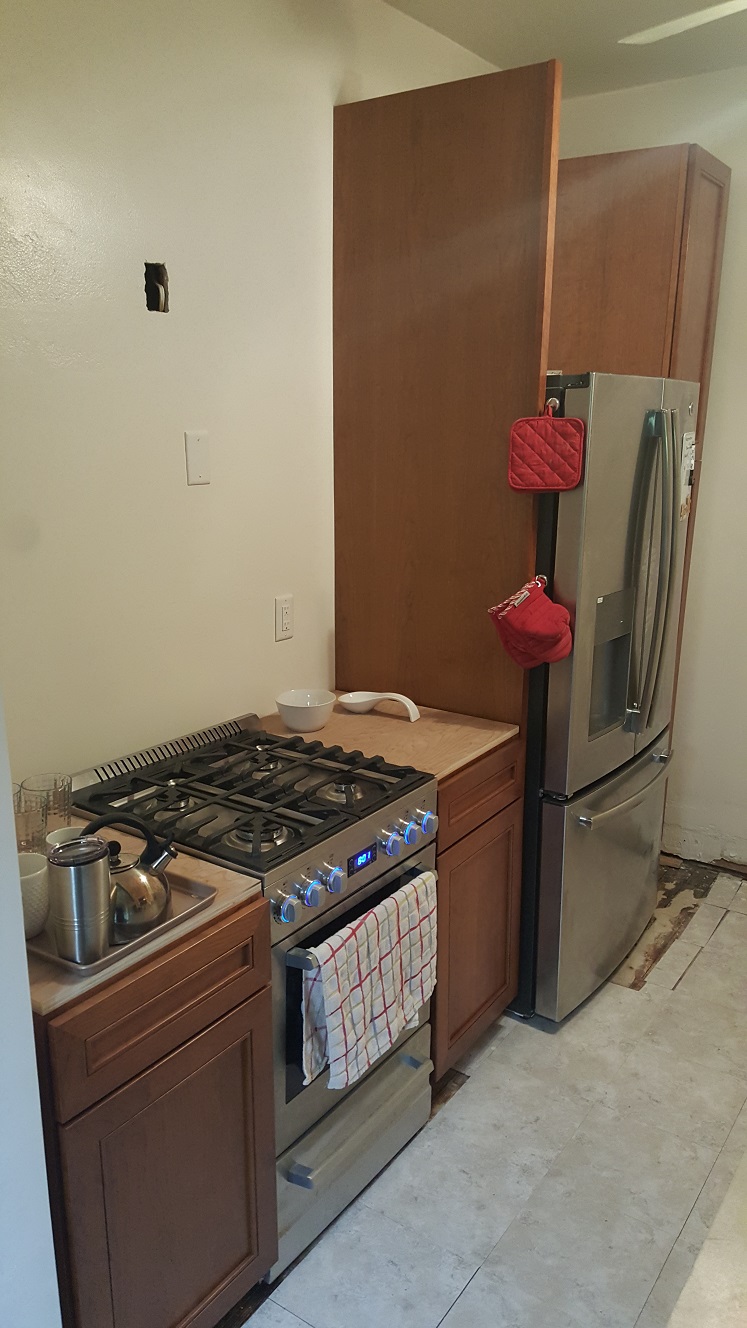
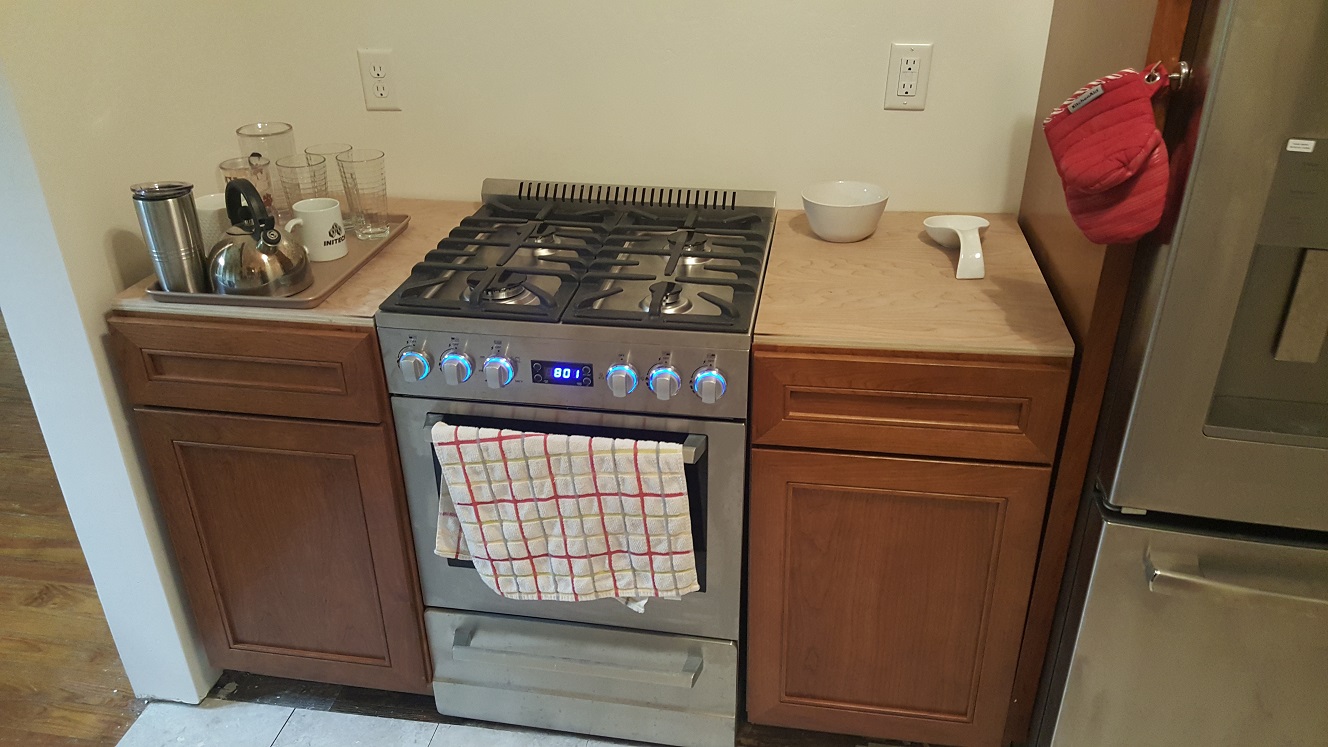
Having gone as far as we can on installing the cabinets for now, it's time to turn our attention to removing the remaining cabinets and rework the plumbing for the new sink. As it stands, the old sink with a garbage disposal is just tall enough to make it into the old metal drain line coming out of the wall. That's going to be a problem with the new sink since it's both deeper and undermount. A quick tally of the height of the drain compared to the new output height of the disposal says the water will need to flow uphill at least 5½"! And I have no idea what to expect until I get the old sink base out of the way and can get behind it to see. Plenty of other things to do until then though.
(Friday - 16 March 2018)
I've been chomping at the bit to get something more done on this kitchen. I really, really just want to be done.
I'm really, really getting tired of having to pass on things I'd rather be doing. I'm really, really getting
tired of going out to eat and ordering in and fast food all the time. And most of all, I'm really, really tired
of having to do it all by myself for the most part. Thankfully the job I'm on at work is winding down and even
the boss thinks it's going in the wrong direction and glad to be done with it soon. Along those lines, I took
today off to get things moving again. Having said that, let's get started...
First thing after Ann is up and moving and out the door and my morning routine is out of the way, it's time to go play ball with the dog. Wait, what? I grab the snips and tape measure to see how long to cut corner molds and snip them to size. Of course, like everything I do, it's wrong. So I snip a little more off both and one of them fits... (rolls eyes) snipping a bit more from the long pole and YAY! It finaly fits... (rolls eyes again) I'm almost afraid to measure for the shims for the drywall under the opening into the dining room. I grab the level and some assorted thicknesses of wood I have waiting for just such an occasion and start to mark out about where the thickness goes up or down in ¼" increments.
At the outside wall end it's a full inch higher than the middle of the opening, but only about ¼" on what used to be the door opening end. I make a little list of how many pieces I need in what thicknesses and how long and head for the table saw in the garage. I figure have some pieces ripped to ¼" and ½" thick already and I'll just need to trim them to length. Wrong. Again, like everything I do... I have ¼" and 3⁄8" thicknesses already cut. No worries as I soon rip some 2x4 leftovers from closing up the doorway into the hall. With the shims cut to fit and in hand, I head back to the house to install them.
Once I have them all in place, I screw in drywall and test it with the level... Like everything else I do - I don't even need the level, I can see with my own eyes it's not right. I unscrew the drywall. I adjust the shims and test with the level before screwing in the drywall again. I screw the in drywall again. I unscrew the drywall again. I adjust the shims again and test with the level before screwing in the drywall again. I screw in drywall again. Good enough. It's not coming down again! Then I screw in the corner mold on dining room side, and realize I need longer screws. That can wait for now since it will be easier to get to the kitchen side once that pennisula cabinet is out, so...
I start preparation for removal of the pennisula cabinet. First I move the microwave and the coffee maker to the dining room table and anything else that needs covered. Then I spread the plastic dropcloth over it. Next I remove the drawers from the cabinet to the living room and then remove the doors, then the slides, then the long middle shelf, then the screws holding down the countertop and the unit to the sink base and the wall. I mark a rough line and cut the countertop along the sink base with the Dremel Saw. Bummer, not deep enough.
I run out to the garage again and come back to cut the rest of the way through with the circular saw. Sparks, kickback, fucking staples. At least it cuts all the way through. A few quick whacks with the chisel near the back to finally separate it from the rest of the countertop still screwed down to the sink base, and the piece over the pennisula cabinet is free. I vacuum up the nasty particle board mess in between the cuts and afterward. Time to open the windows and ventilate the nasty smell of freshly cut and burnt particle board. Time to move that countertop out to the front porch and out of the way.
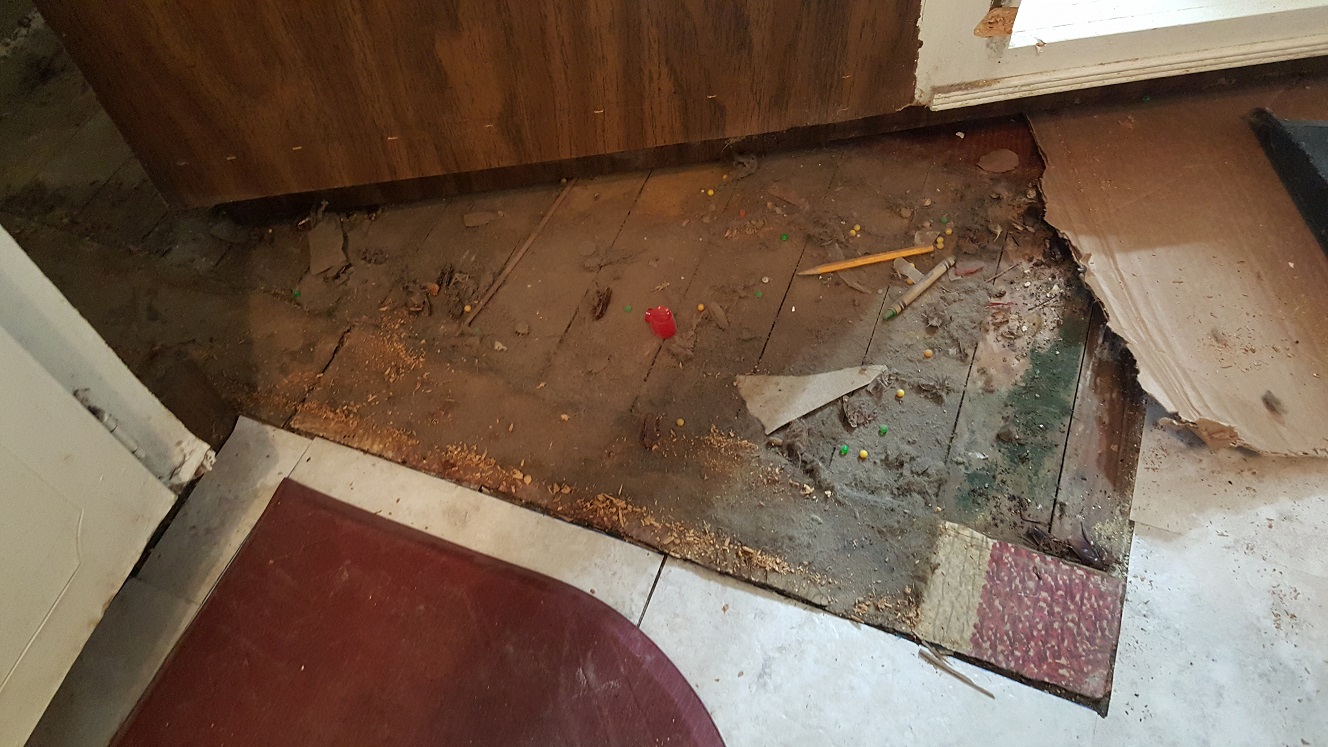
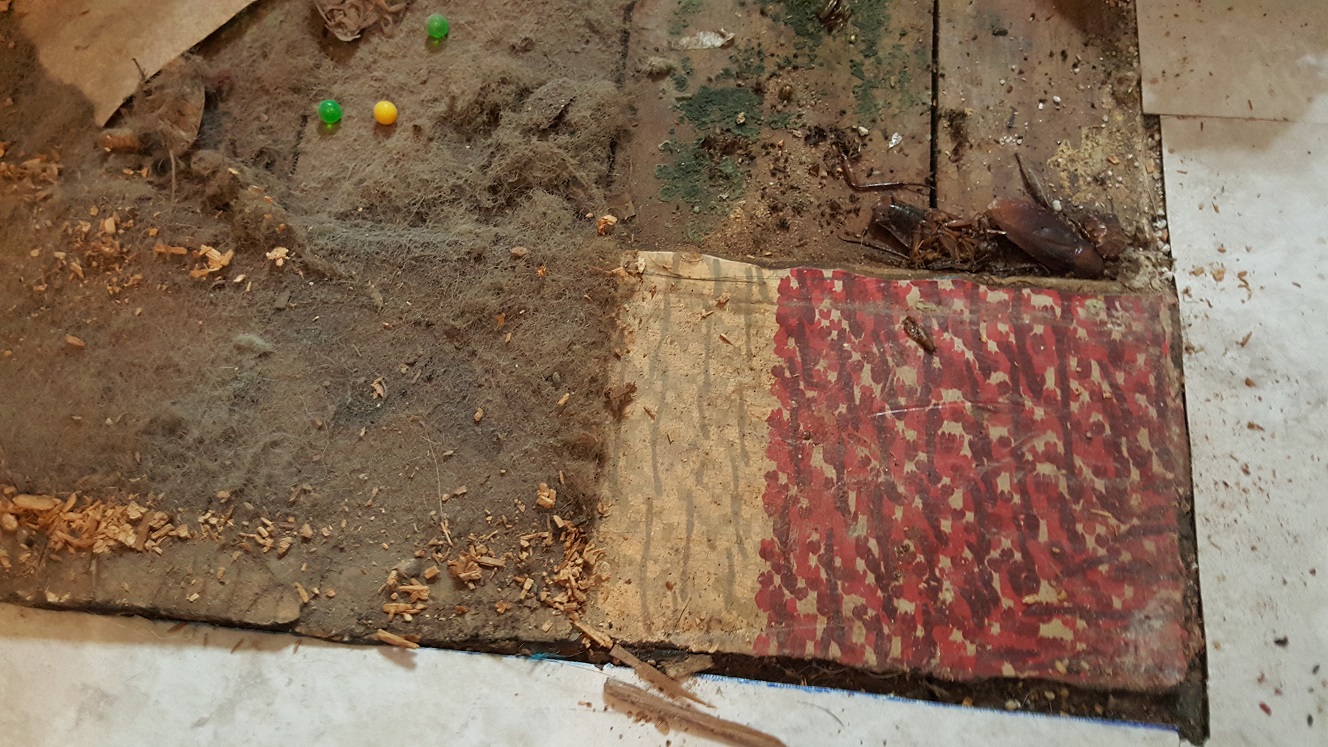
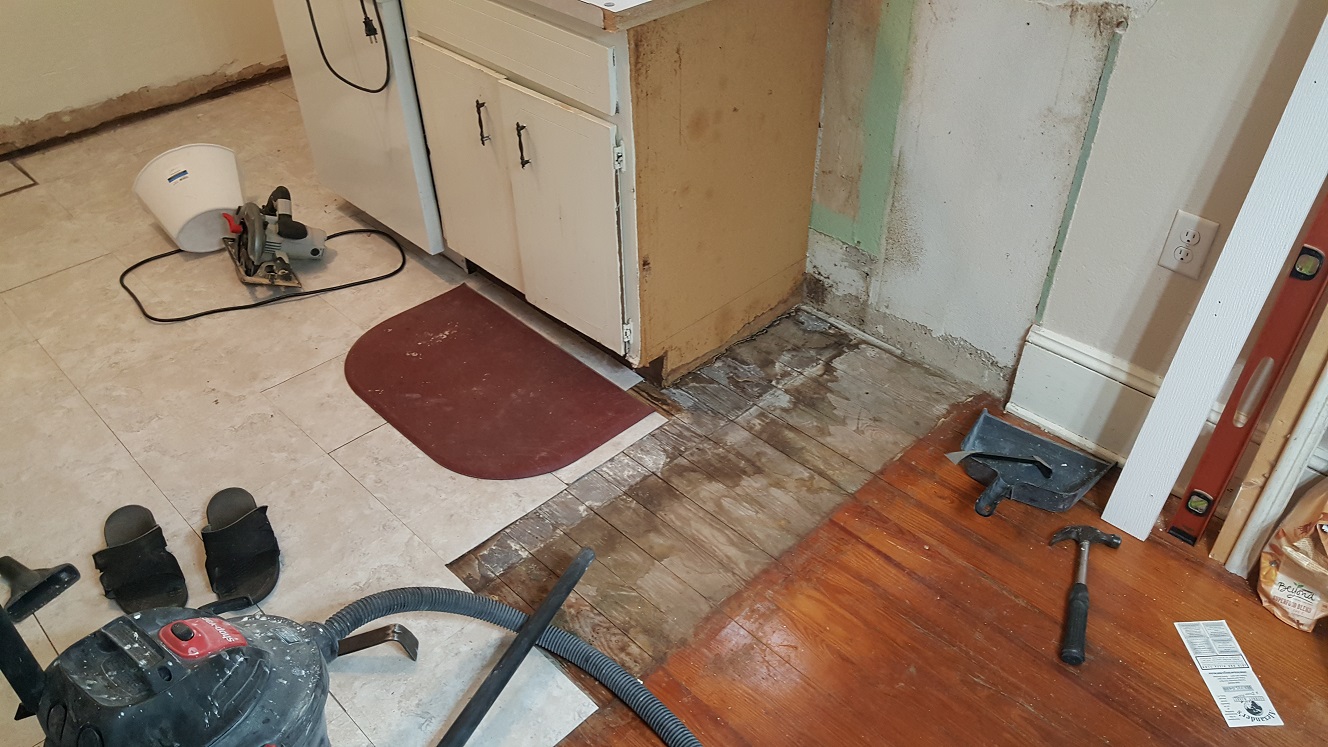
The pennisula cabinet still won't move, is it still screwed in somewhere? Maybe. Still painted together at the sink base. Probably. A few quick whacks on the joint with the cat's paw and it's free. I drag it out a bit into the dining room at an angle. What I find beneath is both curious and disgusting. More vacuuming. I find a lot of airsoft pellets, a green-yellow crayola, a used watercolor brush, and a lucky penny (face up). Also find a lot of dust somehow "glued" to the floorboards (spider silk?), a bunch of dead roaches (the big kind, not the little german ones I was expecting to find), and yes, two layers of linoleum.
I grab the box from the left side base cabinet off the front porch, unfold it, and move the old cabinet onto it to finish cleaning the floorboards and give it someplace to be out of my way. Another trip to the garage with a "side trip" to play ball with the boy. Almost forgot to grab the longer drywall screws from the garage. With the screws in hand and now easy access to the kitchen side of the drywall, I finish up the corner molding and prepare for mudding.
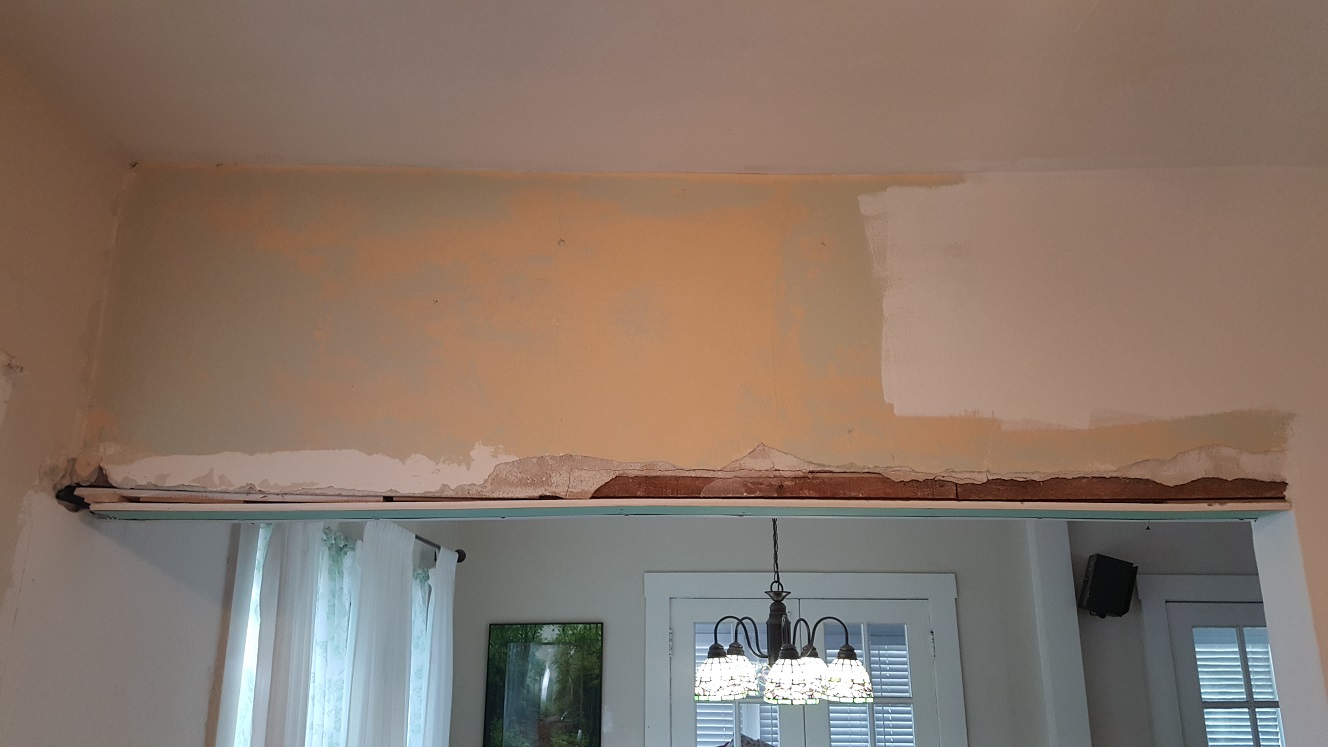
The first batch fills in kitchen side and underside nicely. The second batch fills in dining room side and big patch where removing the pennisula cabinet reveals my original patch job for the makeshift back splash peeled right back off, revealing the lower vein of loose top coat beneath the huge expanse I already have above it on the dining room wall. No matter, two buckets and it's all first coated.
<< Previous | Kitchen | Demolition | Plaster '70s Wall | Plaster Cabinet Wall | Wall Cabinets | Sink Cabinets | Plumbing | Plaster Sink Wall | Flooring | Cabinets | Countertop and Sink | Finishing Touches | Next >>
(Saturday - 17 March 2018 - Happy St. Patrick's Day!)
Slept in until 7:30? Unheard of! Ann cleans out the cleaning supplies and whatnot from under the sink so I can
start the removal process, or the investigation process at the very least. Sitting here updating this while she
and Nick are off to Lowe's yet again for supplies to pour more concrete for his patio pads. The plan is for them to work
on that while I get more demolition done here. It's nice to be able to take my time getting started, not having
to worry about getting over to Nick's first thing.
It also gives me more time to play with the puppy. But the boy plays his "let's play" card one time too many this morning, and now he's playing his "Look at how cute I am" card, as he's bugging me to go play again. He nudges my coffee and spills it on me and the new laptop, so I tell him he's used up all of his cards, and we're not going out to play again this morning. He decides he'll go bite his sister's head and try to stir up trouble (play) there instead. That's not working either.
I put on more coffee and empty the dishwasher while I'm waiting for it to "perk". The boy finally settles down, laying down on the living room carpet. Good. Now that the coffee's done and he's settled in, I can get my work clothes on and get started... But first, let me set that 96" filler in place next to the pantry. WTF? It's only 91.5" long too? Guess that's okay since the kick panel can be the 3" longer it needs to be to cover that extra space between the base and the wall. Sure is going to make fitting the baseboard difficult though. Still, it's kind of irritating because it's labelled 96", not 91½", and I wasn't expecting to have to figure out how that's supposed to work without notching something... Like the baseboard!
Back to it, today is the day the sink base comes out, so let's start with the... dishwasher? That's right, the dishwasher needs to come out first because it has multiple connections under the sink, in addition to those for the sink itself. First off is the access panel under the front of the dishwasher so I can "retract" the front legs. Time for that all 1⁄16s wrench to "screw" them back in and out of the way. The back has "rollers", little plastic wheels, that make it easier to get in and out of that space. But first, I need to disconnect both the supply and the drain. I turn off all four supply valves, then disconnect the supply from the hot water feed. Next is the clamp on the drain hose that connects to the garbage disposal.
With everything disconnected under the sink, I wheel it out just far enough to get into the hardwired connection under the front corner. Time to kill that circuit at the breaker panel. I try a screwdriver then remember this takes a ¼" nut driver to get the cover off. With that out of the way, the connections are broken, the clamp loosened and the feed removed. All that remains is the drain line, which I disconnect at the junction near the pump, then remove through the cutout in the side of the sink base. Let's just wheel that over here, out of the way, shall we? Nice. That leaves the garbage disposal, the switched outlet for the garbage disposal, and the water filter systems. That's right, systems. Plural.
We had one of those dedicated spigot ones that runs slow but does a good job. Ann has always wanted one the connects directly to the sink faucet, and I've always told her if she could find one that didn't severely limit the flow, she could have one. She and Nick managed to finally find a system that's designed to connect directly inline with the cold water line to the main faucet. So now we have two, at least until the new sink goes in, then we'll have just the larger capacity one. Anyone need a slightly used water filtration system? Anyway, those are next to come out.
I look for a bucket for the water to drain into when I disconnect the slip fittings on the waste side of the garbage disposal and the trap. I decide to just use one of the mixing buckets I've been using for the mud. Good enough. Then I disconnect all of those flare fittings and unscrew the filters, one by one by one, and empty them into the bucket too. Then the screws that hold the filter hangers to the cabinet and that's done. I unplug the garbage disposal, ready to finally get it out of the way. Now I'm looking for that tool, the one that's suppose to stay under the sink with the disposal, in case it jams or you need to loosen the mounting ring to remove it. In search of the box of undersink supplies... Ah, there it is. And the disposal is out.
Now I'm looking for all the screws that hold the remaining countertop to sink base and the dishwasher beauty panel. I remove all the ones I find, and lift it free... Well, almost. Turns out I missed one but it didn't really stop me from lifting (ripping) the countertop the rest of the way off, including the sink. At first I thought I would need to loosen all of those holddown clamps and remove it first, but the more I thought about it, the more sense it made to just wait until I had it out and on the floor. I have much better access to the clamps and don't have to crawl around under the sink with an already water damaged and questionable floor.
With all of that out of the way, I have access to the last remaining item that needs to go before I can get the sink base out, the switched outlet for the garbage disposal. A few turns with the screwdriver, and that's out too. Quite a few turns actually. Unfortunately, the CPVC water supplies come up through the floor of the sink base, as does the water line to the refrigerator. I'll need to cut out the section of the sink base floor between them and the wall. Easy enough to go through the decrepit old particle board with a chisel and a hammer. I start from the holes for the supplies to the wall, then between the supplies, and with the last whack the entire chunk falls to the floor.
The sink base is now free and on its way to the curb, along with the decrepit countertop, to join the rest of their friends waiting for trash pickup. That is, once I get the sink out of the countertop. The clamps offer some resistance, but not too much, and the sink and faucet are soon free of the decrepit countertop. I set the sink aside, with faucet still attached, in case I can rig a temporary base setup. In hindsight, that's really only wishful thinking on my part though. The only thing left standing is that beauty panel, but not for long! It's actually nailed into the door trim along the wall and screwed into the floorboards. It joins its friends at the curb too. Not bad for a day's work! Well, half a day's work anyway.
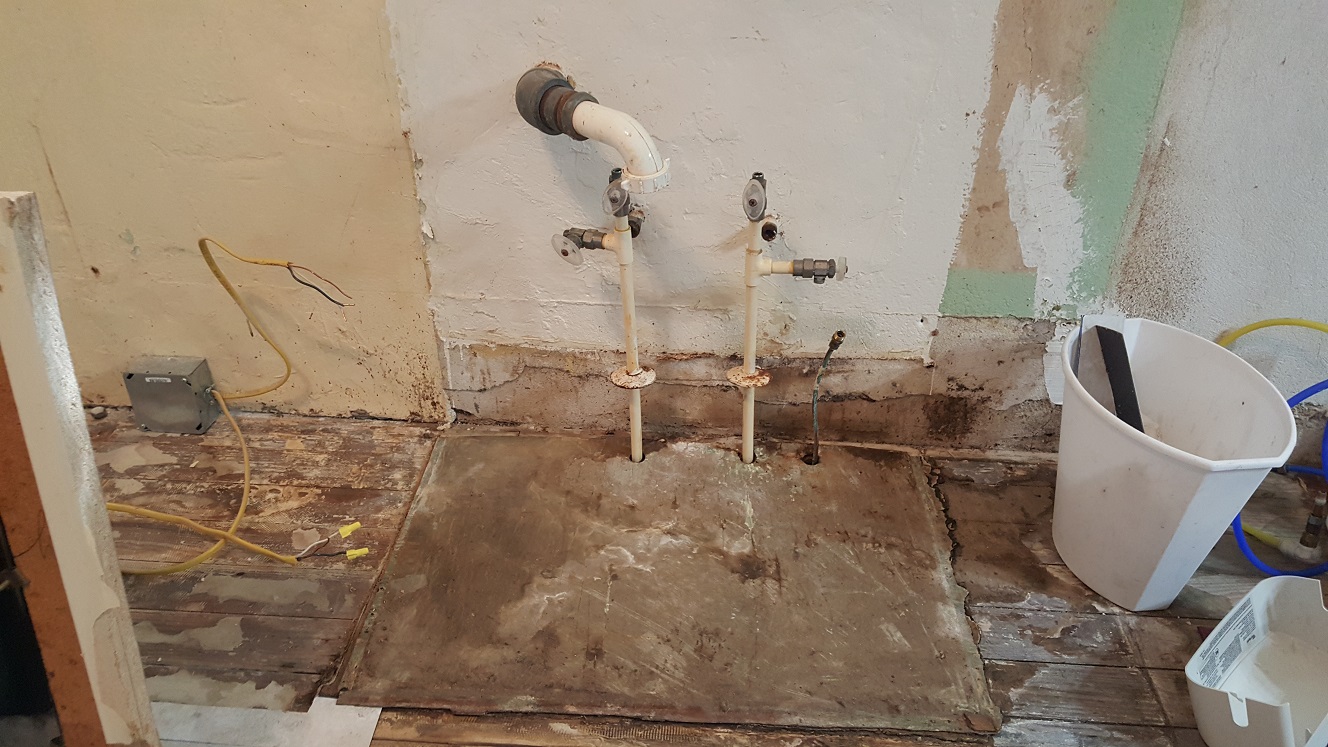
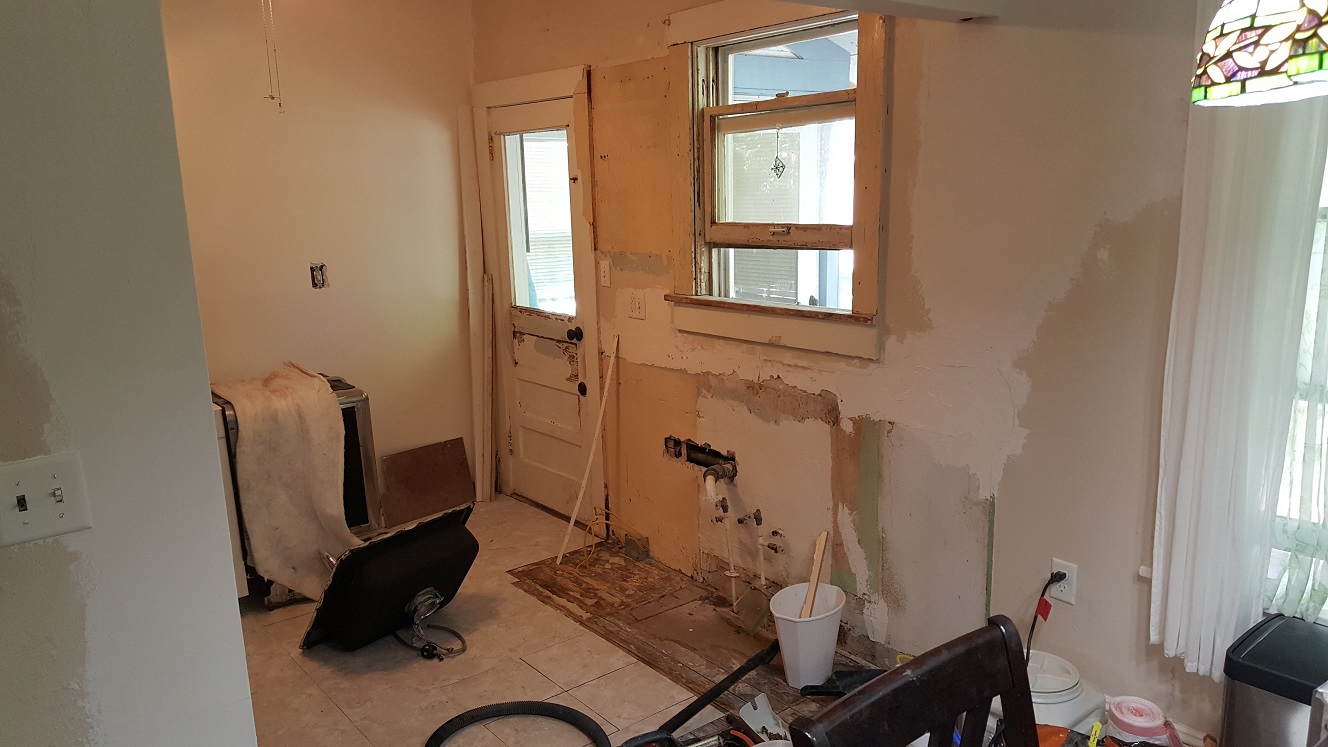
I can see what looks to be a big "patch" in the wall plaster around that drain and over to past where it would tie in to the stack. I can't stand it anymore! The suspense is killing me! What's hiding behind that wall, besides that cast iron stack, with a drain leg that's now too tall? I must know. Armed with hammer and... screwdriver? That's right, I don't really have a good set of chisels. I don't really have a set of chisels at all. I do have the biggest Sears Craftsman screwdriver I own, the one I always use instead of a chisel. I slowly knock out an opening in that patch in the plaster, following the drain leg over to the "tee" in the stack.
Wow. It looks like that really was a patch in the plaster and this was installed after the house was first built. That or someone changed their mind when the house was being built. Maybe, maybe not, since the stack in the attic makes a couple of 90° bends that it wouldn't have if it weren't an afterthought or later rennovation. Can't tell though since the galvanized pipe comes up through the wall too. Again, it sure would be nice to have a complete history of this house! The best part? The wall stud that runs down the left side of the kitchen window has been sawn through completely, with just a chunk of wood about an inch square, to span the opening and act as a nailer for the lathe!
This is interesting and confusing at the same time! But enough plaster bashing for now. I see that chunk of wood that I forgot to remove when I first took down the wall cabinet on this wall. A few quick whacks with the cat's paw and off it comes, along with a sheet of paint. I use the sharp edge of the cat's paw as a scraper and peel more paint off of the door trim. Then I move to the window trim. The paint is peeling off easily, and in large sheets. I'm on a roll. I decide now is the time to see what that piece of metal on the edge of the window sill is, and what's holding it on there, screws or nails? A bit of scraping one of the fasteners and around it reveals they are screws.
Now that it's easy to get to, I grab the correct sized jeweler's screwdriver and start to remove those screws. One by one they're coming out, revealing rusted shanks, but with enough thread left to still do their job. Not anymore. The section of aluminum angle is off along with the little chunk around the corner on the left, which reveals more paint to remove. Not sure why it was put on, unless it had to do with what looked like old formica that we removed awhile back. The wood itself is solid and not rotted. Not there at least. On top of the sill you can tell it's been wet, more than once, but it's not too bad and should clean up with some sanding.
I keep at it and get all the paint that will peel off the trim, the sill, and the inside portion of the lower sash before finally throwing in the towel. Time to clean up this mess and prepare for the dinner time rush. Ann and Nick want to go to Steak -n- Shake, but I don't want to have to get cleaned up just to go there, so I tell them to just go ahead and go without me. Ann asks if I want them to bring me something back and I say sure, a rootbeer float would be nice, so she gets out her travel mug to put it in to keep it from melting on the way back. When they get back, they didn't have a rootbeer float, but a birthday cake milkshake will do nicely. Now all I have left to do is soak in a hub tub and get cleaned up.
(Sunday - 18 March 2018)
I'm freaking out over the sink drain and having to
crawl around under the house. I need the truck to go pick up the plumbing supplies I'll need, like 10'
lengths of copper supply and PVC waste line. Well, Ann and Nick have to go pick up breakfast first. So, I'm
waiting on them. Then they have to go clean out the truck and the Jeep, so I'm waiting on them again.
Not sure what that's all about, but needless to say, another late start and it's almost noon before the truck
gets here. I thought Nick had some car club thing to do today? Anyway, I'm wondering if the big pipe wrench
is here or over at Nick's... I ask if he remembers if it's here or at his house. "I have no idea..." We'll
just leave it at that for now.
Not much else gets done today except agonizing over plumbing code and how to do the kitchen drain correctly. Fucking vents! I started looking at my options yesterday, and was satisifed with just using an air admittance valve (AAV) then, but the more I read, the more I realize they're a last ditch workaround for not being able to do it correctly to begin with. If it fails, and they do, there's the potential to flood the new cabinet. So I turn my attention to looking at how to correctly modify the cast iron stack and even a total replacement with PVC all the way to the roof. Maybe it's a good thing I didn't have the truck to "rush" out to Lowe's after all.
It's information overload with all this research. Much of the information is spread over multiple code books, like building, mechanical, residential, not just plumbing. And I thought it was difficult trying to decipher the electrical code book! For the most part, I concentrate on the drain and the vent stack. And of course, it's the internet, so everyone has an opinion... From - leave it to the professionals, cast iron is heavy and I know this guy that lost fingers when it came crashing down, to - don't worry about it, something is bound to be connected to it and that will support it. I've got to say the latter isn't even an option as far as I'm concerned!
I can certainly understand the cast iron is heavy part, 16½# per foot for the standard 4" pipe used for the main stack. Thankfully this is just a simple 2" stack with a single horizontal sink drain line. Not sure how much that weighs, but compared to the 4", it has to be lighter. So somewhat less danger, but it will still need support before cutting a section out of it. I've decided I'm just going to cut in PVC for the new drain location so I don't have to replace all of the old cast iron, including that roof flashing and the boot around it. The last thing I want is to have the old cast iron above shift or drop out of the roof and come crashing down through the kitchen ceiling.
That's the plan for now anyway. I've been looking at riser clamps to do the job of supporting the stack in the attic, but it does not appear there is enough room to fit a standard set in place since the stack is right up against the stud and the outside wall shiplap. I don't know if they make a 90° version, but I'm thinking a couple or strategically placed 2x4s beneath the 90° elbows will provide the proper support and allow it to be strapped in place. I may be able to get a standard set beneath the last bell of the vertical section before it enters the wall space from the attic, but I'll have to figure out the support for the clamp. Some diagrams show a set a vertical 2x4s as supports on either side of the clamp, but that just seems a bit rickity to me.
Perhaps I'll just use some strap iron around it, under the bell, bolted to a 2x4 attached to the existing wall studs. In any case, it's time to start looking at renting a cutter and what else needs done in order to prepare, like figuring out how tall the new drain line needs to be so I don't have to cut a hole in the floor of the new sink base cabinet yet still low enough to work with a deeper undermount sink and an attached garbage disposal.
(Monday - 19 March 2018)
Working remotely today. While I was hoping to get more done on the plumbing, doesn't look like I'll get much
of a chance to, work is keeping me busy . When I
finally do get a few minutes, I decide to chip out around the old galvanized supply nipples, abandoned in place,
still protruding from the plaster. Nothing exciting here. Just the elbows I expected to find. Let's see if we
can get them out of there without too much trouble. I grab the pipe wrench from the box it's been sitting in
back in the "office".
As I'm scraping my knuckles on the plaster trying to bust them loose, I'm wishing I had that big @$$ pipe wrench about now. As I go to set the pipe wrench down on top of the dishwasher, which is just waiting for a ride over to Nick's, I spot that big @$$ pipe wrench handle sticking out of a plastic grocery bag, just sitting there! Wow. Glad someone told me. Actually, glad I said something to Ann about really needing it to get the old drain pipe loose. Guess she told Nick, that or he found it, and he dropped it off. I try it on the pipe nipple that's left but it's not biting? I try it on the BIG drain pipe but it's not biting there either? It's as if the jaws are on backward or something.
I finish up with the same wrench I used on the other one and soon have it out too. Now to have a look at what's going on with that big one. It's as if something is jamming the "floating" jaw, the one that's supposed to bite down tighter as you rotate the handle. A closer look at the mechanism reveals a metal cage, or carriage, around that floating jaw that's supposed to be spring loaded. Well, it appears that spring has turned on it's side, not allowing that carriage to pivot enough allow the jaws to fully open. I wind the floating jaw all the way out of the wrench then figure out how to get that carriage to slide out so I can right the spring. After some cursing and finagling, I finally manage to get the spring and carriage installed correctly. With that and the floating jaw installed, I'm back in business!
My main concern about doing anything with that drain leg is breaking the seal loose, or worse yet, cracking the cast iron trying to bust the threaded pipe loose. I try to figure out the best angle to reduce the amount of torsional load on the rest of the pipe, but soon realize no matter how I try, that pipe is in there. I head out to the garage for the penetrating oil. A few squirts of that should do it. I strategically position a paper towel and proceed to spray it everywhere anyway. Great. Wonderful smell you've discovered... I open the windows for some ventilation and I let it sit for a while to do its job.
A few shoves on the pipe wrench handle later and it's out! I don't think there were more than two threads holding it in and I can see daylight through them! Wow. Between that and all the crud sitting there in the rest of the pipe it's a wonder the sink drained at all... I set the piece of removed drain pipe on the steps outside the side porch, hoping that removing the major source of the odor will help eliminate it more quickly. About that time Ann is home from work and discovers the smell too. She decides to open the side porch windows and leave the door to the porch open. Again, anything to eliminate that odor.
(Thursday - 22 March 2018)
Working remotely today. Not much gets done other than looking up more building code and
exposing more of the stack. I need to know better what I am looking at as far as the stack and what all
is still hidden behind that wall. I remove just enough plaster to reveal the bottom of the cast iron "tee"
that connects the drain to the stack.
About the only other excitement is probably the best railroad graffiti EVER! Powdered Toast Man painted on the ENTIRE side of a boxcar! Watching the Flagstaff AZ live feed last night I see it roll by, do a double take, and tell myself it can't be... A quick rewind and sure enough - Powdered Toast Man! I pause it a couple places and get some screen captures. I was just telling Nick I don't care much for all that "tagging" that just looks like a bunch of jibberish and half @$$ed garbage "art". Guess I'll have to give this one a pass...
(Friday - 23 March 2018)
Working remotely today. Nick texts after lunch asking if I want us/him to work on supporting the stack in
the attic. Sure, come on by. I let him know that I'll need him to measure between the studs first so I can
cut a 2x4 to fit. I also have him get some pictures while he's up there. I remember I have a chunk of 2x4
sitting in the corner of the living room and pass it to him to try different configurations. It works to
our advantage as we sit and look at the pictures and decide what we're doing. A quick trip to the garage
to cut the 2x4 to size and we're ready to begin.
Nick heads up and gets it all screwed in place. I ask him to take some pictures of the final product while he's up there so I can have a looksee. When I look at the last picture, I kind of freak out... It looks like there's a hole rusted in the side of one of the cast iron elbows and it's leaking water, I'm thinking from the recent rain over the last few days. I ask Nick to head back up and check it out, just to be sure we don't have to replace all the cast iron, making the work we just finished all for nothing.
He checks it out and finds that it's just the shadows on the line in the casting and what looked like water was something else that hardened there on the bell of the hub. Whew! Crisis averted. I ask him where the other end of the pipe strap is mounted and he says the back of the 2x4... Wow. Not what I wanted, but then again, I'm not up there doing it either. I ask him to move it so that it's hanging over the top of the 2x4 like the other side. I hear him having to totally unscrew everything just to get to that one screw that held the strap to the back of it.
I guess I should have been more explicit about why I wanted it strapped over top on both sides to begin with. Not only so it could be easily adjusted in the future for settling and such, but also it wouldn't have to be removed to do so, because now what's holding it up? That's right, nothing... This time the picture shows the strap isn't really totally under the hub, but close enough for now. If I want it done better, I'll do it next time I'm up there. Let's move on and get something else done.


More to come, so stay tuned...
The finished product will hopefully be well worth the effort and all the headaches.
<< Previous | Kitchen | Demolition | Plaster '70s Wall | Plaster Cabinet Wall | Wall Cabinets | Sink Cabinets | Plumbing | Plaster Sink Wall | Flooring | Cabinets | Countertop and Sink | Finishing Touches | Next >>